Another ground source heat pump update

So… we’ve been living with our IVT Greenline HT+ E11 11kW ground source heat pump for another week or so now and I happy to report that it’s still performing admirably.

The outside temperature is just below 0°C and the house is nice and warm, with the new part of the house with underfloor heating at around 20°C.

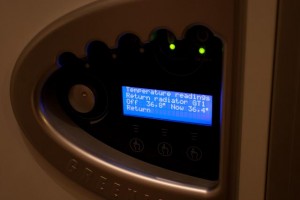
The glycol based heat transfer fluid which collects heat from the ground is currently entering the heat pump at 1.3°C and after heat has been extracted from it, it is being returned to the ground loop at -1.9°C.

We currently have the hot water temperature set to 48°C but I’m going to try lowering that to 47°C in an effort to squeeze a bit more efficiency out of the system for no noticeable impact.

I’m also watching the electricity meter and compressor operating times like a hawk but so far my gut feel is that we’re using less electricity than we were over a similar period of cold weather last year.

The heat pump throws a wobbler!

All has been well with my new ground source heat pump system since it was commissioned at the beginning of January although it has needed a fair bit of tweaking of controls to get everything working as desired. It’s taken me a couple of weeks to really understand how all the different settings work together to produce the end results, but I think I’m almost there with it now…

That was until the underfloor heating simply refused to get warm a couple of days ago!

The target temperature being shown by the heat pump for the underfloor circuit looked perfectly reasonable yet the actual temperature reading from the sensor next to the shunt / mixer valve controlling the underfloor supply was way too low. And it simply refused to get anywhere near the target temperature despite regardless of any settings changes I made. After previously thinking I’d got the heat pump operation and control completely sussed, this was a bit of a let down.

After speaking with the excellent technical support team at ICE Energy they decided it would be best if an engineer came out to check the shunt valve, so an appointment was booked.

Shortly afterwards I just happened to be looking over the heat pump installation and I noticed that the pressure gauge for the unvented system had dropped from the normal of around 2 bar to just over 0.25 bar. This wasn’t right so I corrected it and lo and behold, the temperature of the underfloor circuit started to rise!

I called ICE Energy back and explained what I had found and they told me that an air lock or low pressure would cause the symptoms I’d been experiencing, which was reassuring.

So fingers crossed, that little hiccup is fixed now. And, as equally important I am back to being confident I know how the system works again!

Our ground source heat pump is now alive!

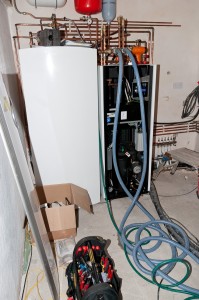
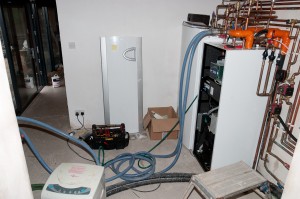
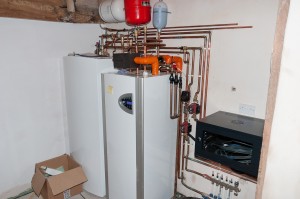
After several months of research, product sourcing, price negotiation, grant and subsidy research, extensive groundworks and final installation, I am very pleased to announce that our ground source heat pump has now been commissioned and is up and running providing heating and domestic hot water for the whole house!

Commissioning


The process of commissioning the heat pump is quite lengthy and involves several steps including:

  • checking the basic installation
  • making final electrical connections to the heat pump
  • filling the ground loop with the water/glycol heat transfer fluid
  • test running the pump components
  • setting initial heat pump controller settings
  • heating the contents of the 300 litre hot water cylinder using the in-built immersion heaters to bring it close to working temperature

All of this was carried out by Ben, a very knowledgeable and competent engineer from ICE Energy and after all the steps were completed the heat pump was powered up and it got up to speed in no time at all.

Initial impressions

The first thing I was relieved to notice was that the heat pump is very quiet. As it is situated in the new enlarged hallway next to the new family room I was praying that it wouldn’t be too loud so as to be noticeable. I had previously been told that it would not sound any louder than a typical fridge but I was still slightly apprehensive given it’s position in the house. However I’m happy to say that it is absolutely fine from a noise perspective. Additionally, it will be enclosed in a purpose built cupboard with the potential for further internal soundproofing so noise will not be an issue.

The second thing I noticed was how quickly it got up to speed heating up both the new underfloor heating and existing radiators in next to no time.

One minor worry we’d had in our minds throughout the installation of this system was whether it would provide sufficient heat for the radiators in the existing part of the house (2/3 of the total house split over 2 floors). As the temperature of the water output from the heat pump is lower than that from other hot water boilers typically used with radiators, we’d been told that the radiators would never get as hot as previously, feeling only lukewarm to the touch. However, since the heat pump was switched on the radiators have felt no cooler than before which was quite a surprise!

The control system for the heat pump is very different to controls found on traditional heating systems, with numerous temperature sensors monitoring the outdoor and indoor temperatures, flow and return temperatures for the ground loop heat transfer fluid, radiators and underfloor heating and using these in combination with various heat curve settings in order to determine how much heat is required from the pump. The wealth of control settings is quite overwhelming but apparently once the system is established we should hardly, if ever, need to adjust these settings.

In conclusion

Overall, I’d say the house has been hotter than we expected since the heat pump took over from the old system, which is reassuring given our initial concerns about how it would cope with so many radiators.

Although the heat pump was configured with an initial range of settings I’m sure there will be lots of tweaking (in consultation with ICE Energy’s excellent technical support line) over the next few weeks until we get to a point where we are comfortable with everything.

More on the ground source heat pump ground loop installation

Following on from my previous post about the work starting on the installation of the ground loop for our ground source heat pump system, here are a few more timelapse videos of the groundworks.

Now that the work is almost complete, one comment I will make is that the scale of the work involved is much bigger than I had originally expected. I knew the numbers involved – 150m of trench in total, 1m wide by 1m deep, 60 tonnes of sand etc. – but until you actually see how much soil is moved and effort involved, you don’t appreciate the scale of it.

Having said that, the guys doing the work have been very efficient and the paddock is well on its way to being back to its state before, minus the grass of course which will have to be grown from seed again once the work is complete.

The ground source heat pump ground loop gets installed!

If you’ve read any of my previous posts, you’ll know that we’re installing a ground source heat pump as part of our barn conversion. Well, the installation of the ground loop collector pipes started in the last couple of days and I siezed the opportunity to shoot some short timelapse videos of the work being done.

The videos linked below show how the 50m x 1m x 1m trenches are dug and how the 200m of pipe loop in each trench is laid as 1m diameter coiled “slinkies” on a bed of 100mm sand. The videos are only short (they were shot with a 15 second interval between each timelapse frame) but are HD so make sure to select the 720p HD option on playback.


My journey into the world of green energy microgeneration and ground source heat pumps…

Over the last few months I’ve been researching and planning a reasonably large building project to convert a thatched barn adjoining my house into additional living space. This new living space will obviously require space heating and domestic hot water (DHW) and so part of the project research has been concerned with investigating and choosing the system to be used.

As our village is off the mains gas grid, the main options open to use are:

  • oil
  • gas (LPG)
  • electric
  • some form of renewable such as air/ground source heat pumps (GSHP), solar thermal, solar photovoltaic (PV), biomass or a combination of these

Our current heating and DHW system is based around electrically heated water driving a traditional wet radiator distribution system. Although powered by electricity, this system has operated relatively efficiently over the last 12 years due to it using a special low rate tariff for the majority of the time. However, this is a bespoke system produced by a company that went out of business several years ago so knowledge and spare parts are pretty scarce, and this coupled with the fact that it would not be large enough to satisfy the requirements of the new complete house means that continuing to use this system would not be viable. We could choose to continue using the existing system for the old part of the house and install a completely new, separate system for the barn conversion but I feel the right thing to do would be to install a completely new system to cover the whole house, old and new. Scared by the thought of ever increasing fuel costs, the idea of a green / renewable energy based system started to appeal more and more. When also taking into account the generous benefits of the Renewable Heating Premium Payment (RHPP) and Renewable Heating Incentive (RHI) schemes (more on this later), it starts to sound even more attractive.

The ground source heat pump

Looking at our particular situation the main technology standing out was a ground source heat pump (GSHP). I had vaguely heard of this technology before but after doing a lot of research it became apparent that this would be ideal for our requirements, particularly because we have a large paddock immediately adjacent to the house and garden in which the ground loop collector pipes could be buried. If you are unfamiliar with what a ground source heat pump is, here is a very brief overview…

The ground below us stores energy from the sun as heat and from a depth of around 1m below the surface the temperature remains pretty constant all year round (between around 7°C to 13°C in the UK). It is possible to extract some of this heat energy using liquid filled collector pipes buried in the ground. The liquid is pumped through the pipes and this warms up as the heat from the ground is transferred to the liquid. Only a few degrees difference in temperature between the flow and return is enough to drive a heat pump unit which can be simplistically described as a refrigerator in reverse! It uses a system of compressors, condensers and heat exchangers to convert the small temperature differentials in the liquid coming from and going to the ground collector pipes (low grade heat) into hot water which can be used for space heating and domestic hot water (high grade heat). Once the heat energy has been extracted from the collector pipe liquid, the cooler liquid is pumped back into the ground collector pipes for the whole process to be repeated.

So, the only “fuel” used in this system is the solar energy extracted from the ground (which is free to us!) and the electricity used to drive the heat pump system. For a system sized correctly and operating efficiently you can expect it to be 400% efficient, that is for every one unit of electricity used to power the system you will get four units of heat energy out of it. Sounds good, doesn’t it! The heat pump can generate hot water for both heating and DHW. It works best driving underfloor heating due to the lower maximum temperature of the hot water it produces (up to 65°C) when compared with traditional carbon fuel based water heaters. However, it can drive radiator based distribution systems albeit at a lower temperature than traditional installations.

Ground loop collector pipes

There are different strategies for the installation of ground collector pipes depending on the land available. Possible options are:

  • straight pipe loops in horizontal trenches
  • coils of pipes, also known as “slinkies”, in horizontal trenches
  • “compact collectors” (which look like plastic radiator panels) oriented either horizontally or vertically in horizontal trenches
  • straight pipe loops in deep vertical boreholes (anything up to 200m in depth!)
  • horizontal pipe loops under water (in a lake or river)

The most common approach is to use horizontal trenches of either straight pipe loops, where enough land is available, or slinkies where there is less available space. In our situation, the most cost effective and suitable option is to use slinkies.

The heat pump and cylinder

The heat pump itself is typically a tall fridge/freezer sized unit with various ancillary expansion vessels and pipework. The flow and return pipes to and from the ground collector pipe system connect into the heat pump as do the heating and DHW pipes. A separate highly insulated cylinder stores the heated water ready for its use. One attractive option for the cylinder is that it can incorporate a separate pipework coil internally which can be connected to a solar thermal installation. This means that hot water from the solar thermal panels can feed into the heating/DHW system thereby offsetting the amount of heat required from the GSHP which in turn increases the overall efficiency of the system (remember, the solar thermal heated water is free – ignoring the installation cost – too!)

Choosing a supplier and a specification for the system

Having decided that a GSHP was the technology to go for the next decision was to find a supplier and installer. I was very keen to find a company who had significant experience of this technology, a good reputation and good levels of support as it is vital that the system is sized and installed correctly for it to operate efficiently. The company would also have to be MCS (Microgeneration Certification Scheme) accredited in order for the installation to qualify for the various government grants available.

After a lot of research I decided to go with ICE Energy given their excellent reputation and long history of supplying and installing GSHP systems. My ICE Energy sales contact Richard Floyd was very knowledgeable and helpful throughout the whole process and provided answers to my many (and there were a lot!) and varied questions. After an initial assessment of the requirements, including details of the property, it’s construction, levels of insulation, number of rooms, ratio of space heated by radiators to that to be heated by underfloor heating, land available for ground collector pipes etc. Richard produced a specification for a system comprising an 11kW IVT Greenline HT+ E11 heat pump, 600m of ground collector pipe installed as 3 x 50m trenches of slinkies and an IVT STS280 280 litre cylinder with solar coil. A further site survey was carried out shortly afterwards by a very knowledgeable and friendly engineer Adrian Rawle to ensure that the initial system specification was suitable and appropriate, and to finalise any fine detail specific to my particular installation. ICE Energy are responsible for the specification of the system, the supply of all components, unlimited technical support during installation and final commissioning of the system once installation is complete. The actual installation of the ground collector pipes will be carried out by my main building contractor responsible for the barn conversion and the installation of the heat pump, cylinder and associated plumbing and electrics will be carried out by the plumbing and electrical sub-contractors working on the barn conversion.

Government grants – RHPP and RHI

It’s worth saying something about the government grants associated with the installation of renewable heating systems as it was a big factor taken into consideration when determining what system and technology to go for. The UK government has made a big commitment to green and renewable energy and one aspect of this is encouraging the take-up of such technologies in the commercial and domestic sectors. For domestic installations this translates into providing two grant and subsidy schemes known as the Renewable Heat Premium Payments (RHPP) and the Renewable Heat Incentive (RHI). RHPP is a short term scheme (scheduled to finish in April 2012) which provides a grant towards the installation of qualifying renewable heating systems. Ground source heat pumps are a qualifying technology which attracts a grant of £1,250. More interestingly, RHI is a longer term scheme scheduled to start in October 2012 which will result in guaranteed index linked payments for a period of 23 years (in the case of GSHP installations) based on the amount of heat energy a qualifying system is generating. The final tariffs have yet to be determined but the estimate at this time is that our particular installation would attract payments of between £1,500 – £2,000 a year!

What next?

The barn conversion has already started (look out for details of progress in other blog posts) so at some point in the next few weeks the work will start to install the ground loop collector pipes in the paddock.

Watch this space!
The Coach House thatched barn conversion

Last year we were successful in gaining planning approval to convert the early 19th century Grade II listed thatched timber framed barn adjoining our house into additional living space. This will double the size of our home downstairs and give us a new enlarged hall, additional open plan living and dining space, a new kitchen and utility room, and will allow us to convert the existing kitchen to a new office/bedroom with en-suite toilet/show wet room.

One of the conditions attached to the planning approval required the production of a photographic record of the barn (on 35mm black & white film!) before the conversion takes place. I undertook this work with the help of my good friend and neighbour (and resident photography expert) and the results form an excellent showcase of the building and its character. A gallery of images taken from scans of the film negatives can be viewed at the following URL:

http://www.darrenscott.com/galleries/barn

Work is due to start on the conversion very soon so I’ll post more about the work and progress over the next few months.

PalmerSport 2011

I’ve just come back from my second full day event at Jonathan Palmer’s PalmerSport complex at Bedford Autodrome – and it was absolutely awesome! Even better than the first time I visited 2 years ago.

For anyone who’s interested in driving and motorsport, this has got to be the best track based driving event available to the public. The first time I visited a couple of years ago it was on a corporate hospitality day, but this time round I paid for it myself. It’s not cheap at just short of a grand, but worth every penny in my opinion. It’s not like your run-of-the-mill “track day experience” type of day, this is full-on driving on 4 dedicated tracks in 6 highly tuned race cars (and a Land Rover Defender off-road) accompanied by highly competent instructors (Lewis Hamilton was a former instructor there!) who push you to your limits.

The cars for the 2011 line-up are:

  • Formula Jaguar “slicks and wings” single seater
    (3.0 litre V6, 250bhp, 6 speed paddleshift, 0-60mph 3.1 secs, top speed 170mph)
  • Palmer Jaguar JP-LM 2 seat Le Mans sports car prototype
    (3.0 litre V6, 265bhp, 6 speed paddleshift, 0-6mph 3.4 secs, top speed 167mph)
  • BMW M3 GTP
    (4.0 litre V8, 420bhp, 7 speed paddleshift, 0-6mph 4.6 secs, top speed 185mph)
  • Porsche 911 JP3
    (3.6 litre flat six, 320bhp, 5 speed paddleshift, 0-60mph 4.5 secs, top speed 175mph)
  • Renault Clio Cup racer
    (2 litre 4 cylinder, 205bhp, 6 speed paddleshift, 0-6mph 5.2 secs, top speed 142mph)
  • Caterham 7 Superlight
    (286bhp/tonne, 6 speed manual transmission, 0-60mph 4.8 secs, top speed 130mph)
  • Land Rover Defender

The line-up is almost the same as the last time I visited with one exception – the addition of the BMW M3 GTP to replace the Jaguar XKR I drove last time. I’ve got to say the M3 is a huge improvement over the XKR which I didn’t particularly get on with last time.

Another addition over previous years is that of on-board video recording in several of the cars. At the start of the day you are given a PalmerSport branded USB memory stick which you keep with you throughout the day and hand over to the instructor when it’s your turn to drive one of the cars with video capability, namely the Formula Jaguar, JP-LM, BMW M3 GTP and Caterham 7 Superlight. The video system has forward and inward rear facing cameras and also records telemetry data which is then superimposed over the video when playing it back using some player software provided on the memory stick.

The mix of people on this latest visit was very different to that of my last visit. As the previous event was a corporate hospitality day, there was quite a range of driving skills present, with the bias probably to the less skilled. This time round as the group was significantly smaller with more individuals as opposed to corporate hospitality attendees, there was a higher percentage of “petrol heads” and the skill level was much higher. I felt I’d done OK but maybe not as good as last time, however when I got home and compared my lap times with those from last time I was surprised to find that I’d got higher scores this time round (apart from on the Land Rover Defender, but I can live with that!) I came 4th overall in the JP-LM and I’m pretty sure I was around that ranking in the Formula Jaguar (they don’t do a ranking in that car for some reason but comparing my best lap time and telemetry trace with the other top drivers I was up there with them).

I’ve uploaded a few photos from the day to Flickr – you can take a look at my photostream on this blog site or directly on the Flickr site.

All in all this was another amazing visit and I can’t recommend it highly enough. Hopefully I’ll be visiting again in the future 🙂

Using banana plugs with the Onkyo TX-SR876 A/V recevier


I use an Onkyo TX-SR876 A/V receiver as the hub of my A/V set up, and a most excellent piece of kit it is too. I bought this receiver from Richer Sounds about 18 months ago for half the recommended retail price to replace my ageing Sony receiver. My old Sony was very low spec when it came to video processing but the Onkyo is pretty full featured allowing upscaling and upconversion of any source, analogue or digital, up to 1080p. This forms the hub of my system with video and audio from all sources (Sky+ HD, PS3, Wii, Pioneer DVD) being upscaled to 1080p and output over HDMI to my Panasonic TH-50PZ700 50″ 1080p plasma.

Anyway, to cut to the main point of this post. This receiver has typical speaker cable binding posts allowing you to either bind in the bare speaker wires or to use banana plugs. However, the posts have black plastic plugs down the centre where the banana plug would be inserted, stopping you using them.

I’d not seen this before but after a bit of research I understood that it was down to some European directive prohibiting their use due to safety concerns. (My take on this is that if someone is stupid enough to stick something in there that they’re not supposed to, let them deal with the consequences, rather than making everyone else suffer!) When I first came to install the receiver I tried to see if these little plastic plugs were removable, but they didn’t appear to be, and rather than use excessive force to get them out when they may not have supposed to come out, I decided to simply wire up the speakers by binding in the bare cable ends.

So, I’ve been running the receiver like this for quite a while now but after reading something on the web the other day about the fact that these plugs can be removed after all I thought I’d just take another look to see if I could get them out…. and I have! By using a small bladed screwdriver inside the hollow plug pushing outwards, I’ve managed to get the plugs out so I can now revert to my preferred means of connection the speaker cables using banana plugs.