I’ve used a Ubiquiti EdgeRouter Lite 3 port router as my main Internet gateway router for a few years now, and it’s a great little device – very fast, extremely feature rich and regularly improved with new firmware updates.
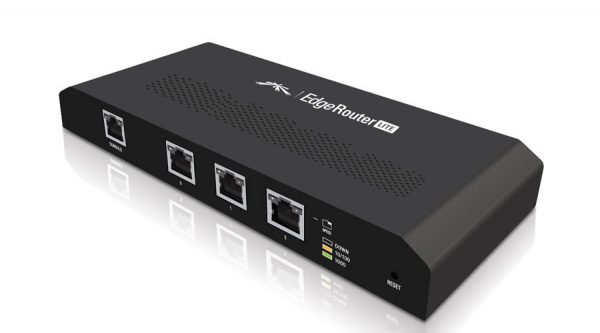
However, I have suffered a couple of incidents within the last year or so where the device has ended up in an unresponsive state following either a power failure or a firmware upgrade attempt. When this happens, the device appears to be working with its lights blinking away, but it can’t be pinged and the web UI doesn’t work. Ubiquiti recommend several steps to reset the device, but these have never worked for me and the only option has been to re-install the EdgeOS software on the device from scratch.
It’s also worth noting that the first time I had to do this, the stock USB flash drive installed in the device had failed so I had to replace it with a new one. Due to the very limited space inside the device, the replacement flash drive has to be very small – the Sandisk Cruzer Fit is just the right size.
So that I can remember exactly what to do if this happens again, I thought I’d write a quick blog post with details of how I did this using my MacBook Pro.
Instructions
To confirm what state the device is in you need to connect to its console port with a standard Cisco RJ45 to DB9 serial console cable like this:
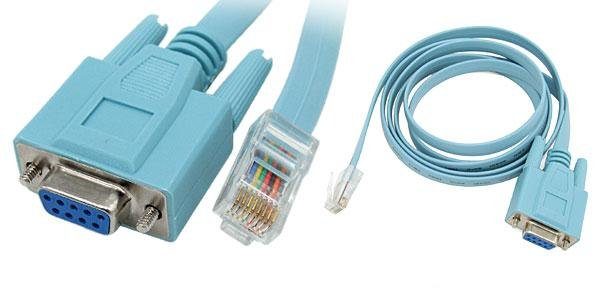
Depending on whether your computer has a DB9 port (which many do not these days) you may also need a serial to USB adapter/cable too.
Once you connect the cable, you need to open a console terminal to it as follows:
- Open a terminal emulator e.g. iTerm or the default Terminal
- Determine which USB device the cable presents itself as by doing:
ls /dev/*usb*
In my case this returned
/dev/tty.usbserial-FTFCU71Uas the device - Use the screen command to open a serial console connection at 115200 baud:
screen /dev/tty.usbserial-FTFCU71U 115200
Once the serial console is connected, power cycle the router and you should see the boot process output appear on the console. In my case, this is what the output looked like indicating that it was unable to boot the firmware (“## No elf image at address…”)
Looking for valid bootloader image....
Jumping to start of image at address 0xbfc80000


U-Boot 1.1.1 (UBNT Build ID: 4493936-g009d77b) (Build time: Sep 20 2012 - 15:48:51)

BIST check passed.
UBNT_E100 r1:2, r2:14, serial #: DC9FDB285B72
Core clock: 500 MHz, DDR clock: 266 MHz (532 Mhz data rate)
DRAM: 512 MB
Clearing DRAM....... done
Flash: 4 MB
Net: octeth0, octeth1, octeth2

USB: (port 0) scanning bus for devices... 1 USB Devices found
 scanning bus for storage devices...
 Device 0: Vendor: SanDisk Prod.: Cruzer Fit Rev: 1.27
 Type: Removable Hard Disk
 Capacity: 15267.0 MB = 14.9 GB (31266816 x 512) 0
reading vmlinux.64

0 bytes read
argv[2]: coremask=0x3
argv[3]: root=/dev/sda2
argv[4]: rootdelay=15
argv[5]: rw
argv[6]: rootsqimg=squashfs.img
argv[7]: rootsqwdir=w
argv[8]: mtdparts=phys_mapped_flash:512k(boot0),512k(boot1),64k@3072k(eeprom)
## No elf image at address 0x09f00000
Octeon ubnt_e100#
A Ubiquiti forum contributor has helpfully provided a recovery kit allowing a clean installation of EdgeOS to be carried out. Details can be found here:
The key steps involved are:
- Download the latest firmware image from the Ubiquiti site
- Download the recovery script image from the VyOS community site
- Setup a TFTP server from where the files can be downloaded by the router
- Connect the router’s eth0 port to your network
- Initiate a TFTP boot from the router using the serial console connection to boot into the recovery script
- Follow the recovery script instructions to download the EdgeOS firmware
- Reboot the router one last time into the EdgeOS firmware
Mac OS X El Capitan has a TFTP server built in and this can be started using the following commands
sudo launchctl load -F /System/Library/LaunchDaemons/tftp.plist

sudo launchctl start com.apple.tftpd
The default location for files served by this TFTP server is /private/tftpboot. You need to copy the router firmware file (e.g. ER-e100.v1.9.0.4901118.tar) and the recovery script image file (e.g. emrk-0.9c.bin) to this location and change the file permissions to make the files readable
sudo chmod -R 777 /private/tftpboot
Then go back to the serial console and setup the network configuration as follows (obviously substituting the appropriate IP of your TFTP server – my MacBook Pro in this case – and the name of the recovery script image):
Octeon ubnt_e100# set ipaddr 192.168.1.1
Octeon ubnt_e100# set netmask 255.255.255.0
Octeon ubnt_e100# set serverip 192.168.1.179
Octeon ubnt_e100# set bootfile emrk-0.9c.bin
Once this is setup, you can then initiate the TFTP boot as follows:
Octeon ubnt_e100# tftpboot
Using octeth0 device
TFTP from server 192.168.1.179; our IP address is 192.168.1.1
Filename 'emrk-0.9c.bin'.
Load address: 0x9f00000
Loading: #######################checksum bad
#checksum bad
checksum bad
checksum bad
checksum bad
#########################################
 #############checksum bad
#########checksum bad
#######################
done
Bytes transferred = 15665511 (ef0967 hex), 561 Kbytes/sec
You may see quite a few “checksum bad” messages but as long as the file transfers successfully in the end, I don’t think they are important.
Once the file is transferred you can then boot the recovery script image as follows:
Octeon ubnt_e100# bootoctlinux $loadaddr
If all goes well, it should boot into the image and display something like “Welcome to EdgeMax Rescue Kit!” and ask you to confirm your are happy to proceed. You will then be asked a few questions about network configuration like this:
Do you want to configure network via DHCP?
yes or no: no

Do you want to configure network statically?
yes or no: yes
Enter IPv4 address in CIDR format (e.g. 192.0.2.10/24): 192.168.1.1/24
Enter IPv4 gateway address: 192.168.1.1
Enter DNS server address: 192.168.1.1

EMRK provides some scripts for automated
recovery procedures:

emrk-factory-reset -- reset config to factory default
emrk-remove-user-data -- remove all the user data including
 config and everything
emrk-reinstall -- reinstall EdgeOS from scratch
 (wipes any user data too)

Enter 'reboot' to reboot your router
The next command you want to run is emrk-reinstall which will prompt you for the name of the firmware image to load from your TFTP server and will initiate the installation of it:
EMRK>emrk-reinstall
WARNING: This script will reinstall EdgeOS from scratch
If you have any usable data on your router storage,
it will be irrecoverably destroyed!
Do you want to continue?
yes or no: yes
Unmounting boot partition
Unmounting root partition
Re-creating partition table
Creating boot partition
Formatting boot partition
mkfs.vfat 3.0.9 (31 Jan 2010)
Creating root partition
Formatting root partition
Mounting boot parition
Mounting root partition
kjournald starting. Commit interval 5 seconds
EXT3 FS on sda2, internal journal
EXT3-fs: mounted filesystem with writeback data mode.
Enter EdgeOS image url: tftp://192.168.1.179/ER-e100.v1.9.0.4901118.tar
 % Total % Received % Xferd Average Speed Time Time Time Current
 Dload Upload Total Spent Left Speed
100 82.9M 100 82.9M 0 0 1121k 0 0:01:15 0:01:15 --:--:-- 1121k
Unpacking EdgeOS release image
Verifying EdgeOS kernel
Copying EdgeOS kernel to boot partition
Verifying EdgeOS system image
Copying EdgeOS system image to root partition
Copying version file to the root partition
Creating EdgeOS writable data directory
Cleaning up
Installation finished
Please reboot your router
Once the firmware image has been downloaded, you then reboot the router to boot into the new firmware!
EMRK>reboot
If everything has worked correctly, you should see a normal boot process output on the serial console and once the router has booted fully, the web UI should be available once more. At this point you need to restore the router config from your last good backup.