Recovering an unresponsive Ubiquiti EdgeRouter Lite router

I’ve used a Ubiquiti EdgeRouter Lite 3 port router as my main Internet gateway router for a few years now, and it’s a great little device – very fast, extremely feature rich and regularly improved with new firmware updates.
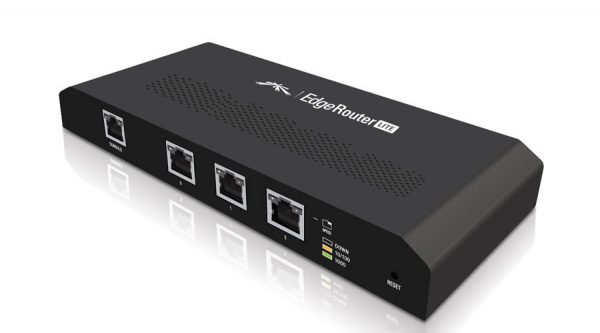
erlite-3-900x500

However, I have suffered a couple of incidents within the last year or so where the device has ended up in an unresponsive state following either a power failure or a firmware upgrade attempt. When this happens, the device appears to be working with its lights blinking away, but it can’t be pinged and the web UI doesn’t work. Ubiquiti recommend several steps to reset the device, but these have never worked for me and the only option has been to re-install the EdgeOS software on the device from scratch.

It’s also worth noting that the first time I had to do this, the stock USB flash drive installed in the device had failed so I had to replace it with a new one. Due to the very limited space inside the device, the replacement flash drive has to be very small – the Sandisk Cruzer Fit is just the right size.

So that I can remember exactly what to do if this happens again, I thought I’d write a quick blog post with details of how I did this using my MacBook Pro.

Instructions

To confirm what state the device is in you need to connect to its console port with a standard Cisco RJ45 to DB9 serial console cable like this:
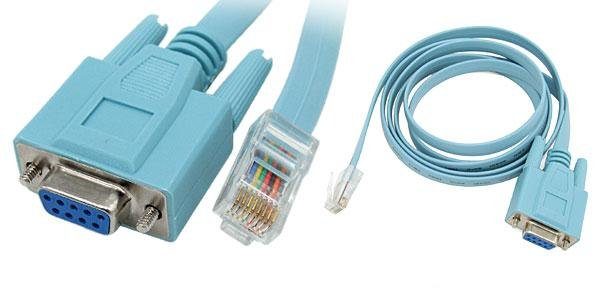
cisco-serial-console-cable-2

Depending on whether your computer has a DB9 port (which many do not these days) you may also need a serial to USB adapter/cable too.

Once you connect the cable, you need to open a console terminal to it as follows:

  1. Open a terminal emulator e.g. iTerm or the default Terminal
  2. Determine which USB device the cable presents itself as by doing:
    ls /dev/*usb*

    In my case this returned /dev/tty.usbserial-FTFCU71U as the device

  3. Use the screen command to open a serial console connection at 115200 baud:
    screen /dev/tty.usbserial-FTFCU71U 115200

Once the serial console is connected, power cycle the router and you should see the boot process output appear on the console. In my case, this is what the output looked like indicating that it was unable to boot the firmware (“## No elf image at address…”)

Looking for valid bootloader image....
Jumping to start of image at address 0xbfc80000


U-Boot 1.1.1 (UBNT Build ID: 4493936-g009d77b) (Build time: Sep 20 2012 - 15:48:51)

BIST check passed.
UBNT_E100 r1:2, r2:14, serial #: DC9FDB285B72
Core clock: 500 MHz, DDR clock: 266 MHz (532 Mhz data rate)
DRAM: 512 MB
Clearing DRAM....... done
Flash: 4 MB
Net: octeth0, octeth1, octeth2

USB: (port 0) scanning bus for devices... 1 USB Devices found
 scanning bus for storage devices...
 Device 0: Vendor: SanDisk Prod.: Cruzer Fit Rev: 1.27
 Type: Removable Hard Disk
 Capacity: 15267.0 MB = 14.9 GB (31266816 x 512) 0
reading vmlinux.64

0 bytes read
argv[2]: coremask=0x3
argv[3]: root=/dev/sda2
argv[4]: rootdelay=15
argv[5]: rw
argv[6]: rootsqimg=squashfs.img
argv[7]: rootsqwdir=w
argv[8]: mtdparts=phys_mapped_flash:512k(boot0),512k(boot1),64k@3072k(eeprom)
## No elf image at address 0x09f00000
Octeon ubnt_e100#

A Ubiquiti forum contributor has helpfully provided a recovery kit allowing a clean installation of EdgeOS to be carried out. Details can be found here:

https://help.ubnt.com/hc/en-us/articles/204959514-EdgeMAX-Last-resort-recovery-of-failed-EdgeOS-device

The key steps involved are:

  1. Download the latest firmware image from the Ubiquiti site
  2. Download the recovery script image from the VyOS community site
  3. Setup a TFTP server from where the files can be downloaded by the router
  4. Connect the router’s eth0 port to your network
  5. Initiate a TFTP boot from the router using the serial console connection to boot into the recovery script
  6. Follow the recovery script instructions to download the EdgeOS firmware
  7. Reboot the router one last time into the EdgeOS firmware

Mac OS X El Capitan has a TFTP server built in and this can be started using the following commands

sudo launchctl load -F /System/Library/LaunchDaemons/tftp.plist

sudo launchctl start com.apple.tftpd

The default location for files served by this TFTP server is /private/tftpboot. You need to copy the router firmware file (e.g. ER-e100.v1.9.0.4901118.tar) and the recovery script image file (e.g. emrk-0.9c.bin) to this location and change the file permissions to make the files readable

sudo chmod -R 777 /private/tftpboot

Then go back to the serial console and setup the network configuration as follows (obviously substituting the appropriate IP of your TFTP server – my MacBook Pro in this case – and the name of the recovery script image):

Octeon ubnt_e100# set ipaddr 192.168.1.1
Octeon ubnt_e100# set netmask 255.255.255.0
Octeon ubnt_e100# set serverip 192.168.1.179
Octeon ubnt_e100# set bootfile emrk-0.9c.bin

Once this is setup, you can then initiate the TFTP boot as follows:

Octeon ubnt_e100# tftpboot
Using octeth0 device
TFTP from server 192.168.1.179; our IP address is 192.168.1.1
Filename 'emrk-0.9c.bin'.
Load address: 0x9f00000
Loading: #######################checksum bad
#checksum bad
checksum bad
checksum bad
checksum bad
#########################################
 #############checksum bad
#########checksum bad
#######################
done
Bytes transferred = 15665511 (ef0967 hex), 561 Kbytes/sec

You may see quite a few “checksum bad” messages but as long as the file transfers successfully in the end, I don’t think they are important.

Once the file is transferred you can then boot the recovery script image as follows:

Octeon ubnt_e100# bootoctlinux $loadaddr

If all goes well, it should boot into the image and display something like “Welcome to EdgeMax Rescue Kit!” and ask you to confirm your are happy to proceed. You will then be asked a few questions about network configuration like this:

Do you want to configure network via DHCP?
yes or no: no

Do you want to configure network statically?
yes or no: yes
Enter IPv4 address in CIDR format (e.g. 192.0.2.10/24): 192.168.1.1/24
Enter IPv4 gateway address: 192.168.1.1
Enter DNS server address: 192.168.1.1

EMRK provides some scripts for automated
recovery procedures:

emrk-factory-reset -- reset config to factory default
emrk-remove-user-data -- remove all the user data including
 config and everything
emrk-reinstall -- reinstall EdgeOS from scratch
 (wipes any user data too)

Enter 'reboot' to reboot your router

The next command you want to run is emrk-reinstall which will prompt you for the name of the firmware image to load from your TFTP server and will initiate the installation of it:

EMRK>emrk-reinstall
WARNING: This script will reinstall EdgeOS from scratch
If you have any usable data on your router storage,
it will be irrecoverably destroyed!
Do you want to continue?
yes or no: yes
Unmounting boot partition
Unmounting root partition
Re-creating partition table
Creating boot partition
Formatting boot partition
mkfs.vfat 3.0.9 (31 Jan 2010)
Creating root partition
Formatting root partition
Mounting boot parition
Mounting root partition
kjournald starting. Commit interval 5 seconds
EXT3 FS on sda2, internal journal
EXT3-fs: mounted filesystem with writeback data mode.
Enter EdgeOS image url: tftp://192.168.1.179/ER-e100.v1.9.0.4901118.tar
 % Total % Received % Xferd Average Speed Time Time Time Current
 Dload Upload Total Spent Left Speed
100 82.9M 100 82.9M 0 0 1121k 0 0:01:15 0:01:15 --:--:-- 1121k
Unpacking EdgeOS release image
Verifying EdgeOS kernel
Copying EdgeOS kernel to boot partition
Verifying EdgeOS system image
Copying EdgeOS system image to root partition
Copying version file to the root partition
Creating EdgeOS writable data directory
Cleaning up
Installation finished
Please reboot your router

Once the firmware image has been downloaded, you then reboot the router to boot into the new firmware!

EMRK>reboot

If everything has worked correctly, you should see a normal boot process output on the serial console and once the router has booted fully, the web UI should be available once more. At this point you need to restore the router config from your last good backup.
Revitalising a Google Nexus 5 – solving battery drain problems

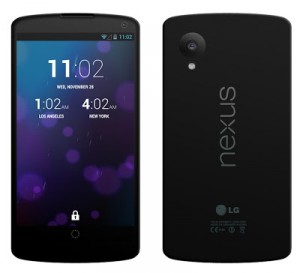
nexus-5-gekkoI’ve owned a Google Nexus 5 phone for just shy of 2 years now (wow, I didn’t realise it had been that long!) and I can honestly say it’s the best phone I’ve ever had – the screen is a good size (5″) but not too big, it’s got plenty of storage (32GB) and is very responsive. I had the Nexus 4 16GB prior to this, and that was a very good phone too, but the Nexus 5 is better in all departments.
However, over the last 3 or 4 months I noticed that the battery was draining more quickly as the day goes on, to the point that I was having to charge it in the afternoon if it was to last me all the way home from work. Not good.

Checking the battery usage stats didn’t reveal any obvious rogue apps draining the battery so I put the situation down to the fact that the battery must have been deteriorating, so I bought a replacement battery and fitted it (using an iFixit guide) in the hope that it would restore the previous battery life. Unfortunately replacing the battery didn’t seem to make much difference at all.

I’d more or less resigned myself to the fact that I’d need to upgrade to a later phone (possibly the Nexus 5X) when I wondered if it would be worth trying one last thing – a factory reset. It was a bit of a long shot but I figured that there might be something nasty left over from the several successive Android updates that had been applied and by performing a full factory reset it might clear out some rubbish.

After backing up apps and data, including using the excellent SMS Backup & Restore app to backup text messages to both Dropbox and Google Drive I carried out a factory reset. This took a fair bit longer than expected (around 45 minutes) but once completed I rebooted the phone and proceeded through the initial setup again. I then restored the main apps I actually use – taking the opportunity to get rid of all those I hardly ever open – along with my text messages.

Nexus 5 Rejuvinated!

After charging the phone overnight I was eager to see what, if any, difference it had made… and to my delight I found that battery drain throughout the following day was nowhere near what it was prior to the factory reset. Whereas I would previously have been looking at only 30% battery capacity in late afternoon, I was surprised to see a significantly improved 80% left. Repeating the same test the following day saw very similar results, so it is looking very promising so far.

So, if you too are experiencing very poor battery life on your Nexus 5 running the latest versions of Android, I would seriously recommend considering performing a factory reset.

Update – 23/12/15

It’s been a few days since performing the factory reset and I’m very happy to report that battery performance continues to be amazing! A couple of friends of mine who were also experiencing very similar battery drain problems have also carried out the same factory reset and they too report results consistent with mine. So get doing a factory reset on your Nexus 5 if you are experiencing battery drain problems!

A month of using my MacBook Pro

It’s been over a month since I got my new MacBook Pro so I thought I’d post a few thoughts on my experience with it so far.

First, I’ve got to say I love it!

It exudes quality in nearly every area.

On the hardware side, the things I love most are:

  • the aluminium unibody construction is rock solid, yet still light
  • the quad core Intel Core i7 processor, 16GB RAM and 512GB flash storage make it fly!
  • the Retina 15″ screen is very high quality and provides plenty of screen real estate to work with. I was concerned about dropping down from a 17″ screen to 15″ but that’s not proved to be a problem at all
  • the trackpad is the best I’ve ever used… very accurate and responsive and when combined with multi-touch gestures takes it to another level
  • battery life has been very good so far (I get home from my 4 hour commute to London and back with around 80% battery left which is fantastic compared with the 20% remaining I used to get from my old HP laptop!)
  • the sleep and instant-on behaviour when closing and opening the lid is great
  • the Magsafe 2 power connector is so quick and easy to connect with its magnetic connection and useful indicator LED showing charging state

On the OS / software side I’ve found working with OS X on a daily, development-oriented basis quite refreshing. The multiple Spaces (desktops) works very well and intuitively with multi-finger trackpad swipes to switch between them. I’m also using the Mission Control (formerly Exposé) feature a lot to see a birds eye view of all applications I have open, and the App Exposé feature to see all windows opened by the current application.

The recent Mac OS X 10.10 Yosemite upgrade looks really nice and makes it even more pleasant to use.

When I’m travelling, I rely on the mobile network connection from my Nexus 5 phone for internet access. With my old Windows laptop I used to use a wifi hotspot on the phone to connect, but on the MacBook I’m using the Bluetooth connection which seems easier and very stable.

The only minor problem I’ve had is that the Moshi iGlaze transparent hard case I fitted for some extra protection started to crack in the corners of the lid cover. This happened just over a month after getting it but Amazon replaced it free of charge when I reported the problem to them. It is a nice case and definitely adds  some valuable protection without detracting from it’s appearance – in fact most people don’t even realise there’s a case on it! – but I think the cracking is a basic design flaw so I’m expecting it to happen again 🙁


I can has MacBook Pro?

I’ve finally done it.

After years of owning cheaper, lower quality laptops I’ve decided to go for quality with my next laptop by getting a MacBook Pro.

I’m now the proud owner of a MacBook Pro with 15″ Retina screen, 2.5GHz quad-core Intel i7 CPU, 16GB 1600MHz RAM, 512GB PCIe based flash storage and NVIDIA GeForce GT 750M with 2GB DDR5 memory. And I’m loving it so far. The two things that I’m most impressed about so far are the instant on/off capability, and also the vastly superior battery life.

My old HP Pavillion dv7-3112sa 17.3″ monster running Windows 7 Home Premium has served me well over the last 5 years but no more will I have to heave it out of my bag while doing the long distance commute by train and sink back into my seat in embarrassment as the spotty kid opposite me pulls out a shiny MacBook. Ha!

It’s going to take me a while to get my new OS X based software development environment and workflow set up but I’m sure it will be worth it.

HP N54L Microserver as a desktop PC

If you’ve read any of my previous posts you’ll know I’m a long time fan of the HP Microserver. It’s an extremely versatile little machine that can be used for many different purposes (one of mine is a FreeNAS based NAS, another is a VMware ESXi virtualisation test machine) and with the various cashback schemes that HP has offered throughout its life, it’s worked out to be a very cost effective option.

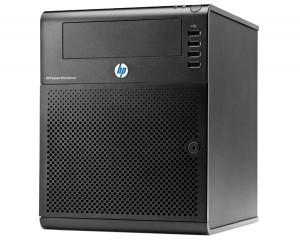
HP ProLiant N54L Microserver

Although it’s designed as a home/small office server I know many people have used them as desktop PCs. I recently built my parents a basic Windows 7 desktop PC in a day, at very short notice when the main low-power PC they used to run their newsagents died.

I had a spare N54L G7 Microserver from the last HP £100 cashback promotion so I thought I would see how effective it would be as a desktop PC for myself, with a view to it possibly acting as a cheap replacement for my 8 year old Windows XP Pro based PC which I was sure was on its last legs.

This ancient PC had an Athlon 64 X2 dual core 4400+ CPU, 3GB RAM and a single NVIDIA GeForce 7800GT video card and has served me well for all these years. It’s graphics capability has changed somewhat over its life – I used to do a fair amount of flight simming on it using Microsoft Flight Simulator 2004 and FSX… it started out with a single 7800GT card, then a second identical 7800GT was added to form an SLI pair, then both of these were replaced with a single 8800GTS card which eventually blew up and so finally I reverted back to a single 7800GT. When I looked at the benchmarks for the Athlon X2 4400+ CPU and compared these with the dual core Atom in the N54L microserver, the microserver came out more powerful! And modern GPUs are much more poweful than the 7800 so it wouldn’t be difficult to improve the overall specs on a budget.

A basic desktop PC

After installing Windows 7 64-bit to the bundled 250GB hard drive I ended up with a usable desktop PC, albeit with only the stock 2GB RAM and using the on-board VGA-out only graphics and no sound. I then installed a few of my frequently used apps and trialed it for a few weeks.

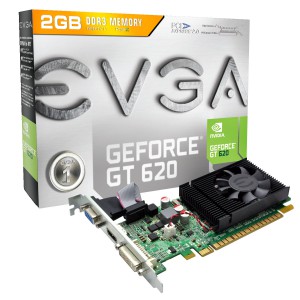
EVGA GT620 2GB DDR3 graphics card

The machine performed admirably during this initial trial so I then decided to get a dedicated PCI-E graphics card to up the graphical power and also to add sound capability…
For the graphics I decided to go with the reasonably priced EVGA NVIDIA GT620 2GB DDR3 PCE-E graphics card for £42 from Amazon. I’d read reports that the 1GB version of this board had been tested successfully in the microserver so figured that the 2GB version should be almost identical. It’s a low profile card with a large heatsink and small fan so hoped it would fit in the limited space available. When it arrived I was relieved to find that it fit with no problems and worked just fine, increasing the Windows Experience Index for the graphical elements by several notches. You can just hear the fan on-board this card so it does add to the overall noise a little, but I wouldn’t describe it as loud and it’s way quieter than the big old cards in the old PC!

For the sound I opted for a bargain basement Dynavision USB sound adapter for the princely sum of £4.99 from PC World!

I also took the opportunity to swap out the 2GB RAM for 8GB of Kingston non ECC RAM from another of my spare microservers, a move which gave Windows more room to breath.

After these relatively minor upgrades the resulting PC felt very responsive, much more so than my ailing Windows XP Pro machine.

My first SSD

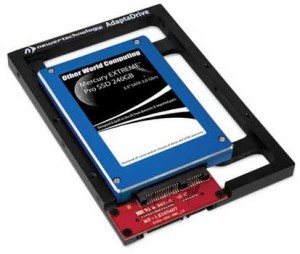
Newertech Adatadrive bracket

I’ve never owned an SSD before and have wanted to give one a try for a long time, so now seemed like the perfect opportunity in an attempt to make this little PC even more responsive. I did plenty of research and decided that the Samsung 840 Pro would be the best fit for this PC. I could probably have got away with a lesser performing drive given that the microserver’s SATA ports are only SATA II 3Gb/s and not SATA III 6Gb/s but I’d read no end of good reviews of these drives so decided that was the one to go for. I deliberated over what size to get but in the end thought that 128GB would not give me much headroom and so went for the 256GB model.

In order that I could mount the SSD in one of the four available drive bays I purchased a NewerTech Adaptadrive SSD to 3.5″ mounting adapter from Ebuyer. This clever little adapter bracket screws to the SSD so that the SATA data / power connectors and drive mounting holes are in the same position as a 3.5″ drive such that it can be mounted directly in the microserver drive bay caddy. This would mean I didn’t have to use up the optical drive bay with the SSD or have to route the eSATA connector back into the case.

Migrating the existing Windows installation

Given that I’d already got a fully tested Windows 7 installation on the 250GB HDD, I used the excellent bundled Samsung Data Migration tool to do a clone of the existing installation onto the SSD. This was very straightforward and took around 20 minutes for the 85GB Windows installation. Once the cloning had completed, I shut down the microserver, removed the 250GB HDD and rebooted, setting the SSD to be the boot drive in the BIOS. On reboot, Windows started as expected and from that point onwards felt even more responsive than before.

In summary

So all things considered, this little experiment has resulted in a very usable and responsive little desktop PC and a more than suitable replacement for my old Windows XP dinosaur.

Summarising good and bad points:

Good

  • Reasonably powerful
  • Good quality construction
  • Small form factor
  • Very quiet
  • Decent spec level (RAM, graphics, SSD)
  • Storage easily expandable (3 remaining HDD bays and eSATA port on rear)

Bad

  • External USB sound
  • USB2, not USB3
  • Only 2 x USB on the rear, other 4 x USB are on the front panel
  • Limited expansion possibility (CPU, graphics, RAM up to 16GB)


I love my (recently repaired, not so new) LG Google Nexus 4

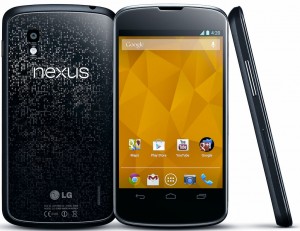
Nexus-4A couple of weeks ago I finally replaced my trusty but dated HTC Desire Android phone with a shiny new LG Google Nexus 4 running the latest version of Android Jelly Bean.

The Desire has served me well but it’s crippled by an appalling lack of built-in storage so I’d been waiting for the ideal replacement handset to arrive and after reading lots of reviews the Nexus 4 seemed like the one to go for, both in terms of specification and value for money.

I bought it directly from the Google Play store for £280 as soon as they came back into stock in the UK, and it arrived within a week even though the stated delivery time was 1-2 weeks. After paying £31 a month on a Vodafone pay monthly contract for the last couple of years I also switched to a 12 month SIM-only contract with Orange after getting fed up of having declining network coverage at home with Vodafone, reducing my monthly bill to £10.50 at the same time – bargain!

After using the Desire for so long, the Nexus 4 was like a breath of fresh air. Very, very responsive running the latest Android Jelly Bean, an amazing quality screen, plenty of storage for installing as many apps as I want and a high quality construction. However, during the first few days of owning it I did notice that it was a slippery beast, frequently sliding itself off flat surfaces due to the highly polished glass back. Although I’m not a big fan of cases on mobile phones as I feel they detract from the natural look and feel of them, I resigned myself to the fact that would probably have to get one for the Nexus 4…

Disaster strikes!

…But I left it too late, and after only 2 weeks of owning it, it slipped out of my hand when getting it out of my jacket pocket and fell onto a concrete floor smashing the bottom left corner of the screen and damaging the digitizer such that the bottom row of controls (yes the main Navigation Bar!) didn’t work any more when in portrait orientation. I was gutted.

Carphone Warehouse Geek Squad to the rescue

After looking into what insurance cover I had for the phone, including any excesses and knock-on premium hikes I would incur if I claimed, I decided to get a quote for repair from Carphone Warehouse. To my surprise they quoted only £79 to replace the screen, digitizer and bezel which sounded like a good deal to me (I’d seen prices online for just the parts alone of around £85!) so I had no hesitation in leaving it with them to repair for me. I’m not sure whether this price was an error on their system but they agreed to honour it as it had been quoted to me.

Just under a week later I got a call to say that it was back at my local Carphone Warehouse store ready for collection. The repair appears to be a top quality job and the phone looks and feels as good as new, so top marks to Carphone Warehouse Geek Squad repairs!

Looking for a case

So my next task is to hunt down a good quality but unobtrusive case. I’ve read favourable reviews of the FlexShield Skin case but I can’t find them in stock anywhere. I’ll keep looking, but in the meantime I’m going to treat my Nexus 4 with kid gloves to make sure it doesn’t come a cropper again!

vSphere 5.1 client not compatible with ESXi 5.0?

I recently upgraded one of my ESXi hosts from version 5.0 to 5.1. The upgrade of ESXi itself went fine (simply boot from the ESXi 5.1 install CD and select the existing ESXi 5.0 installation as the target and it gives you the option to perform an upgrade rather than a fresh install), but trying to access this subsequently with my existing vSphere 5.0 client install resulted in a message informing me certain components had to be downloaded. When I looked at what it was wanting to download it turned out to be the vSphere 5.1 client installer which I could sort of understand, so I proceeded with the upgrade of the vSphere client. Once the vSphere 5.1 client had installed I was then able to access the ESXi 5.1 host.

However, when I then tried to access one of my other ESXi 5.0 hosts the vSphere 5.1 client gave me the same message as previously and asking if I wanted to download new components. Looking at what it was downloading this time it turned out to be the vSphere 5.0 client installer! This suggests – and I couldn’t find it documented anywhere online – that the vSphere 5.1 client is not backwardly compatible with earlier ESXi hosts, which seems a bit dumb to me.

So, if you are upgrading an ESXi host from 5.0 to 5.1 and want to be able to able to manage all your ESXi hosts with the same vSphere 5.1 client, you will need to upgrade them all to ESXi 5.1.

RAID on my HP ML115 G5 ESXi server

Continuing with my exploits at rebuilding my HP ML115 G5 based home server running ESXi 5 I’ve now turned my attention to data resilience by looking at a hardware RAID solution.

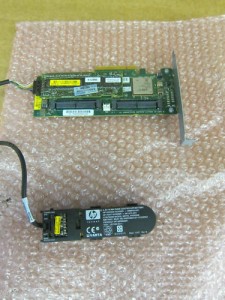
After a bit of research I decided on using an HP Smart Array P400 Controller as it seems to be a good balance between performance and cost, particularly when coupled with the optional 512MB battery backed accelerator cache. Another reason for choosing the P400 controller is that it appears on the VMWare ESXi Hardware Compatibilty List.

There are lots on eBay for a reasonable price, many of which appear to be pulled from decommissioned enterprise rack servers. I got mine for £60 including the 512MB cache and battery.

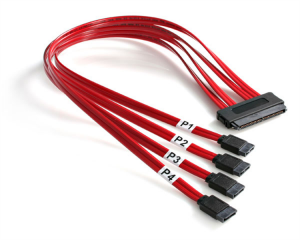
The P400 features 8 channels split across two SFF8484 connectors. Typically these are connected to hot swap SAS drive cages but they can also be connected directly to attached SATA drives using an SFF8484 to SATA breakout cable, such as this one sold by Startech.

I’ve never used a hardware RAID solution before so it’s a new learning experience for me. The process involves using the HP Array Configuration Utility (ACU) – which can be booted from CD/DVD or USB flash drive – to create a new array containing the desired physical drives, and then on this array creating a logical drive in the required RAID scheme. For my initial tests I’m going to use a couple of HP 160GB SATA drives configured as a simple RAID 1 mirror which will hopefully give me the data resilience I need. With more drives available other options such as RAID 1+0 or RAID 5 are possible.

I want to do some testing with this configuration, including ensuring it works fine with ESXi and also by removing one of the drives to simulate a failure so I can understand how it handles an array in a degraded state and how it recovers. Assuming everything goes well and I am happy with it all I will then look at converting my current live ESXi installation over to RAID 1 scheme using the existing 250GB HP SATA drives I have. Fingers crossed it all goes OK!

The dead HP ML115 – the plot thickens…

So, I’ve now replaced my dead HP ML115 G5 server with one bought on eBay and built a second one from a combination of parts from my original broken one and another bought for a bargain price on eBay.

Once the second ML115 G5 was built, I just thought I’d try the old “broken” motherboard in this new chassis… and lo and behold, it works!

When I previously investigated the problems with my original server, there was no sign of life when powered up. No motherboard LEDs lit, no fans and no response to the on/off switch. So I tested the HP power supply out of the chassis with a couple of hard drives connected and shorting the connectors for the on/off switch. The PSU fan and hard drives span up suggesting the PSU was OK. I then tried an old, spare non-HP ATX PSU I had lying around and this didn’t seem to work either. So my conclusion was that either the motherboard or the chassis wiring was at fault – with the motherboard being my strong suspicion.

Well now I know that the motherboard is OK. The original motherboard works fine in the original chassis with one of the “new” PSUs. I’ve also just tried again with the spare non-HP ATX PSU and it works! So my investigation and testing of the PSU was woefully inadequate.

I suspect that genuine replacement HP PSUs are going to be prohibitively expensive so I’ll either look for a used one on eBay or look at using a non-HP ATX power supply instead (the only downside of the latter being that the HP PSU is a non-standard size – it’s smaller – and so fitting a standard ATX PSU in the chassis needs some minor modifications for additional mounting holes and also leaves a gap between the PSU and the top of the case).

I’m going to have enough HP ML115 G5 servers before I’m done to start my own mini datacentre!

Unable to SSH from one ESXi host to another – solved

While setting up ESXi 5 on my new HP ML115 G5 server I needed to migrate some guest VMs from another ESXi host I have. I found a couple of online blog posts about how to enable the ESXi shell and SSH services for the two hosts, but I was still unable to ssh from one host to another, repeatedly getting connection timeouts.

I could reliably SSH to both ESXi hosts from other places, just not from the hosts themselves. I also could not SSH to other hosts from either of the ESXi hosts – so this strongly suggested a firewall type issue.

It wasn’t until I checked the Firewall settings in the vSphere client under Configuration -> Security Profile that I realised that SSH Server and SSH Client have separate firewall controls for inbound and outbound SSH connections. The SSH Server option (i.e. for inbound connections) was enabled but not the SSH Client option. As soon as I enabled the client option I was then able to establish SSH client connections from my ESXi hosts.