Energy efficiency and saving money with LED lighting

As readers of my previous blog posts may know, I’m all for being energy efficient – primarily because of the savings that come with using less energy more than anything else! We’ve got a ground source heat pump as our sole source of heating and hot water, accompanied by a 4kW solar PV array; the newer barn conversion part of our house uses modern insulating materials and has underfloor heating throughout; and the loft space in the original slate roof barn conversion part of the house has been beefed up to 300mm of Knauf Earthwool insulation.

Although we’ve improved energy efficiency and made considerable savings by doing all of the above (we now use around 30% less electricity compared with previous years) one area that was still a large drain on electricity was lighting. Most of the lighting in our house still uses either classic incandescent bulbs or the newer slightly more efficient eco halogen bulbs. We do have some LED lighting, for example in the architectural spot lights illuminating the timber frame roof in the thatched barn conversion, garden patio lighting and kitchen under-shelf lighting. I also recently replaced the two 100W globe bulbs in the large Original BTC Titan metal pendant lights in the kitchen with Megaman 18W globe bulbs which will add to the overall savings. However, the bulk of the lighting is still old technology.

Most of the remaining lights in the house are exposed metal dimmable wall lights with visible shadeless 60W candle bulbs. The fact that they are dimmable 60W candle bulbs has meant that I have struggled to find suitable LED replacements… until now.

Enter Megaman…

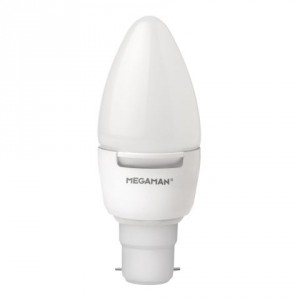
megaman-7w-ledHaving been impressed with the Megaman LED bulbs bought so far and also by their good reputation, I decided to try a couple of their 7W dimmable warm white 400 lumen candle bulbs (model number LC0607dv2-B22-2800K). Even though these are marketed as equivalent to 35W non LED bulbs I was pleasantly surprised to find that they were nearer to the existing 60W bulbs than I had expected at full brightness.

Older style leading-edge dimmer switches don’t work well with LED bulbs so after a bit of research I decided to upgrade our existing switches with Varlight V-Pro replacements. These are recognised as being quality dimmers and are even recommended by Megaman themselves. The switches are also configurable so you can switch between 2 or 3 different trailing-edge / leading-edge modes and can also set the minimum and maximum brightness levels – clever stuff!

After trialling these bulbs and dimmer switches in one location I was happy enough with the results to bite the bullet and upgrade two rooms – a total of 10 bulbs and 2 dimmers, at a cost of around £170.

The results

So, let’s look at some electricity usage and cost savings as a result of this upgrade.

Taking one of the upgraded rooms which has 6 bulbs, and assuming that the lights are on for an average of 5 hours a day, 365 days a year and our electricity charge is 12p/kWh:

Using 60W incandescent bulbs we would use 365 x 5 x 6 x 0.06 kWh of electricity = 657 kWh = £78.84 per year

Using 7W LED bulbs we would use 365 x 5 x 6 x 0.007 kWh of electricity = 77 kWh = £9.24 per year

So, in just one room we can making a saving of over £69 a year!

It might not sound a lot, but when you apply the same upgrade to further rooms the savings start adding up. And it’s also worth bearing in mind that the life of quality LED bulbs should far exceed that of incandescent or eco halogen bulbs.


Thunderbird 38.1.0 unresponsive on MacBook Pro OS X Yosemite

I’ve used Mozilla Thunderbird as my desktop mail client of choice for years, switching from Microsoft Outlook because of its initially poor support for IMAP after I first switched from a POP3 to IMAP model for all my locally hosted mail accounts.

I’ve never really had many problems with automatic Thunderbird updates in the past, but the recent Thunderbird version 38.1.0 update caused me some major problems.

One of these was that it broke SSL connectivity to my Courier IMAP SSL service across all platforms – OS X and Windows. After a lot of digging I eventually found the cause of the problem was a tightening of security around key lengths and I had to tweak the dhparams.pem file in my Courier installation. This blog post discusses how to do this. After fixing this Thunderbird 38.1.0 was able to connect again over SSL.

The second problem was limited to OS X and this resulted in Thunderbird becoming unresponsive most of the time. Again after a lot of Googling I found that the cause was the Google Birthdays calendar configured in Lightning.After removing this calendar, Thunderbird became responsive again.

Hopefully this info might save someone else some pain if they experience the same problems.

Renewable Heating Incentive (RHI) is here

I’ve written previously about my Ground Source Heat Pump (GSHP) and how it would be eligible for the Renewable Heating Incentive (RHI) once launched. Well, after several delays, the RHI was finally launched in early 2014 so I proceeded with making an application.

In case you are not aware of the RHI, it’s a UK Government backed subsidy scheme designed to encourage the up-take of renewable energy sourced systems for heating. This includes technologies such as ground and air source heat pumps, biomass boilers and solar thermal panels. The RHI scheme is similar to the Feed in Tariff (FiT) scheme already in place for solar PV installations in that you receive a tax free, index linked payment every quarter for a period of 7 years (compared with the 25 year period for solar PV FiT) based on the amount of renewable heat you are generating for yourself. When combined with the solar PV FiT payment, this more than covers the cost of installation of the new technology and also will pay for our only fuel source – electricity – for the next few years. For more information about RHI visit the Ofgem site.

Applying for RHI

While the actual RHI application process was relatively straightforward, getting to a point where I could make the application proved to be a bit more complicated…

One pre-requisite for applying for RHI is that you have had a Green Deal assessment carried out to determine the EPC rating for your property i.e. how energy efficient it is and what measures should be considered to improve it’s rating. I had already increased the loft insulation to a depth of 300mm in our relatively small loft space, and with the recent barn conversion utilising modern building techniques and materials our energy efficiency was better than it had been over previous years. As a result, our EPC rating came out as C (70) with an estimated total heating and hot water demand of 25,000kWh per year which wasn’t too bad considering it’s an early 19th century barn conversion.

Heat pump SPF assessment

However, the biggest delay to being able to make the RHI application was down to the desire to have a heat pump performance assessment carried out in an attempt to secure the highest possible RHI benefit rate. The RHI tariff is based on the amount of renewable heat generated, so this has to take into account the efficiency of the heat pump i.e. the more efficient the heat pump is, the greater the ratio of heat generated to electricity used to generate it (to drive the pumps). This efficiency is called the Seasonal Performance Factor (SPF) and the RHI scheme assumes an SPF of 2.5 for all applications for legacy heat pump installations. Now I was pretty sure my heat pump was more efficient than that so I commissioned Ice Energy, the supplier of the heat pump, to carry out a full assessment.

The assessment involved a site visit and survey with lots of measurements of rooms and construction materials taken followed by an office based analysis running the numbers through a spreadsheet. This process took longer than I had hoped and when I finally got the results back, I found that it had been assessed with an SPF of 2.5 – the same as the default! The reason for this was that two radiators in two large open plan connected rooms in the older part of the house were deemed as undersized. So, if I wanted to achieve an SPF of 2.8 I would either have to install additional radiators or replace the existing double panel double convector radiators with larger ones. As space was tight I decided to upgrade these radiators to triple panel triple convector equivalents, a job which I did myself.

Once the new radiators had been installed, Ice Energy issued an updated SPF rating of 2.8 which would increase the annual RHI benefit by around £300 – more than paying for the cost of the heat pump assessment and new radiator installation. With the final agreed SPF rating and Green Deal assessment / EPC I could then make the actual RHI application.

The application took a few days to go through an approval process, but once completed I was informed that my first quarterly payment of £733 would be made in November 2014, with subsequent index-linked payments being made quarterly for the full 7 years. I love my Ground Source Heat Pump!

Tracking down a lost iPod

My daughter lost her 5th gen iPod Touch earlier today 🙁

She had been at home all day apart from a short visit to the local doctor’s surgery with my wife. She remembered using the iPod before going to the doctors, but couldn’t remember if she took it with her. So – it was most likely to be somewhere in the house, in the car or left at the doctor’s surgery. However, by the time she realised it was missing, it was past the doctor’s surgery closing time so we couldn’t call them to ask if anyone had found it.

We’d never got round to enabling Find My Phone in the Cloud services on this iPod so that was no use 🙁

After a couple of hours of searching the house, garden, car etc. by the whole family, we still couldn’t find it 🙁

But then I used a bit of (simple) technological detective work and we managed to locate it safe and well 🙂

In the chance that it might help someone else in a similar situation I thought I would share exactly what I did to track it down…

Logical steps…

The first thing we did was to try calling the iPod from another iOS device using FaceTime. We tried this several times and listened for the ring tone each time but this proved fruitless.

Then we tried messaging using iMessage. When we did this, we noticed that each message was given a status of “Delivered”, but not “Read”. This suggested that the iPod was on a network somewhere. Now our doctor’s surgery doesn’t have public WiFi so this meant the iPod had to be close enough to our home wireless network for it to be connected! We’re getting somewhere…

Armed with this knowledge, I logged into the admin pages of each of the dd-WRT based wireless access points in the house and grounds (there are 5 in total!) and checked the wireless client lists of each. This listed the MAC addresses for each connected client.

I then checked the messages.log on my Debian Linux server which provides DHCP for the whole of my network and found the DHCP entries relating to the missing iPod. The most recent DHCP request/offer/assignment sequence was only a few minutes earlier so this was further evidence that the iPod was still recently alive and on the network. This also gave me the MAC address of the iPod which I could use to determine which access point it was connected to.

Checking the access point connected client lists again I found the relevant MAC address and this showed it had a signal strength of 50%, so it was pretty close to the access point in the utility room at the far end of the house. We were getting warmer!

And finally, after having a good search in that area we found the iPod down the side of the cushion in a comfy chair in the corner of the kitchen!

Our solar PV installation – a year on…

Following on from the previous short post about our experiences of a new Ground Source Heat Pump system a year after its installation, here’s an even shorter post about how our solar PV array has performed a year on from when it was installed.

(For earlier posts about our solar PV installation, read these…)

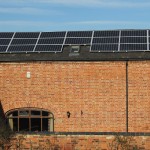
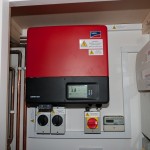
Our installation comprises of 20 x Linuo 195Wp monocrystalline PV panels mounted on Schüco Lite rails connecting to an SMA SunnyBoy SB4000TL-20 inverter. The installation was specified, supplied and fitted by the excellent Greenday Renewables based at Fort Dunlop, Birmingham.

The original estimate for the total annual output of our installation, based on historical local climate and meteorological data, was 3,560 kWh. Our actual output for the first year has been 3,585 kWh which I’m pleased with given how much poor weather we’ve had this year.

As we managed to secure the higher Feed in Tariff (FiT) rate of 43.4p/kWh at installation time (which increases every year as it is index linked) we have generated an income of around £1,700 for this first year, plus any additional savings from not having to import as much electricity by using our own generated electricity as much as possible. Based on these figures the system should have paid for itself within 5 years.

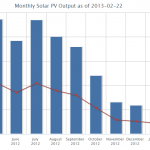
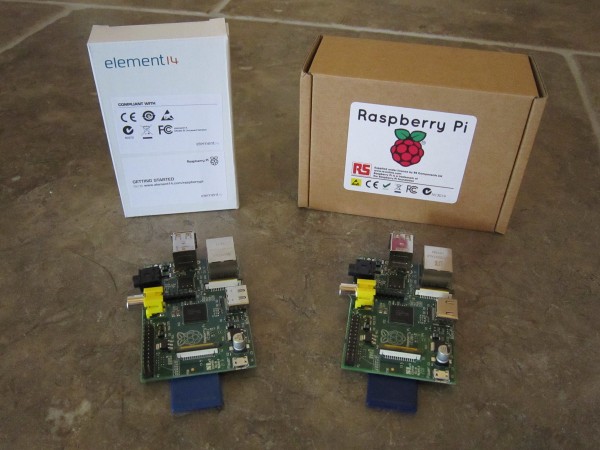
Being a true geek, one of the first things I did after the system was installed was to set up some automated logging and reporting of data acquired from the inverter by connecting to its bluetooth interface. This data logging solution has evolved over time but is now implemented using the open source sma-bluetooth project running on a Raspberry Pi single board computer with a USB bluetooth adapter, storing captured data in a MySQL database and producing real-time web accessible charts using PHP and the excellent Highcharts library.

I look forward to reporting on how the system has performed after it’s second anniversary!

The ground source heat pump – a year on…

It’s just over a year now since our IVT Greenline HT+ E11 11kW ground source heat pump (GSHP) was installed so I thought it would be the perfect time to reflect on our experiences of owning and running a system like this, and also importantly to do some quick analysis on how much electricity we’ve used over that period compared with previous years.

If you’re interested in previous posts relating to the heat pump, take a look at these…

A bit of background…

First, though, it’s worth a re-cap on why we decided to install a ground source heat pump  in the first place. During the latter part of 2011 we extended our house considerably by converting an adjoining timber-framed thatched barn into additional living space and creating an enlarged entrance hall, a new open plan living and dining space, large kitchen and utility room. Our existing central heating and hot water system was an electrically heated wet system with radiators designed to work with low-rate electricity tariffs. Although electrically powered (which sounds frighteningly expensive!), this had worked reasonably well and efficiently over the previous 12 years since installation but it was nearing end-of-life, the manufacturer had gone out of business and it was simply not big enough to satisfy the increased demands of the enlarged property. So it had to be replaced with a new system.

After looking at all the options available to us, particularly as we are off the gas grid, and comparing various traditional technologies with newer ones, a ground source heat pump emerged as the ideal choice for us.

At the time we decided on a GSHP we also planned to add a solar thermal installation to supplement the hot water. As it eventually turned out, we didn’t install solar thermal and instead opted for a 4kW (peak) solar PV array which, we were told, would be a very good companion to the heat pump.

Installation and commissioning

Our GSHP system was supplied by ICE Energy, probably the UK’s biggest and most experienced supplier of GSHPs. It was important to me that we chose a company with a lot of experience given the general lack of knowledge and even awareness of this technology, and we definitely got that with ICE Energy. Their sales, engineering and technical support staff were very knowledgeable, efficient and professional at all times so I would highly recommend them to anyone else looking for a heat pump.

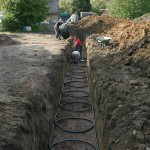
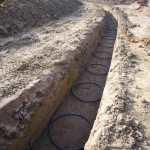
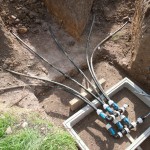
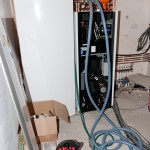
The installation of the heat pump, cylinder and associated plumbing was pretty straightforward for the plumber working on our barn conversion, even though he had never installed one of these before. The work associated with the installation of the ground collector pipework loops was a lot more than I had originally imagined, with some 300 tonnes of soil being moved during the course of the work: digging the three trenches, 50m long x 1m wide x 1m deep, laying 200m of coiled collector pipe “slinkies” in each trench, creating a concrete inspection chamber to house the pipework manifolds, filling the trenches back in and making good the paddock again. Having said that, it was all completed within about 4 days and even though my paddock looked like a barren wasteland for a few weeks, it didn’t take long for the re-seeded grass to grow back and look as good as it had previously.

The commissioning of the system, which included checking the basic installation, filling the collector ground loop with the heat transfer fluid and powering on the system for the first time was carried out by an ICE Energy engineer. He also talked through the basic operation of the system, how to tweak the controls and what maintenance tasks needed to be performed. There was a lot of information to take in but I also had the full manual which I read several times to make sure I absorbed the important detail.

The early days

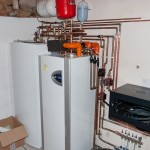
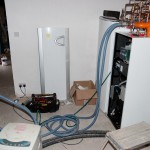
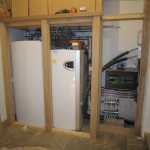
Initial impressions of the system were very favourable. It was very quiet in operation, which was an important factor given that it is housed in specially made oak framed cupboards in our entrance hall, immediately adjacent to our main living area.

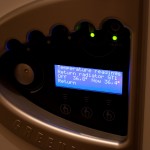
The first few months involved a lot of tweaking of the system settings in order to find an acceptable level of comfort while still trying to keep it running as economically as possible. The primary settings of the heat pump include a heat “curve” which dictates how much heat the heat pump should generate given the current outdoor temperature and the temperature of the water returning from the underfloor/radiators. The steeper the curve, the more heat it will generate at lower temperatures. There is also a “fine tune” setting which raises or lowers the heat curve (not adjusting the slope of the curve) to increase or decrease the target temperature. One other setting I tweaked was that of the domestic hot water temperature, which was initially set to 49°C. I lowered this to 47°C which was still perfectly acceptable for hot water but would squeeze a little bit more efficiency out of the system by not being required to maintain quite as high a temperature.

The installation has been problem free apart from one occasion during the first couple of weeks after installation where our new underfloor heating wasn’t reaching the desired temperature, and this turned out to be because the pressure in the unvented system had dropped. Once this was corrected we had no further problems like that.

It’s fair to say that the house, particularly in the old part with traditional radiators, was cooler than it had been previously during this initial running-in period but we eventually found the settings that worked for us under all conditions and we’ve not changed them since. In fact, that is one of the selling points of a system like this – once it is set up, you shouldn’t ever need to touch it again!

Maintenance

There is virtually no maintenance to be carried out on the GSHP and I believe this is true for the whole life of the system. You do have to check a couple of particle strainer filters a couple of times a year, one external to the heat pump unit on the ground loop circuit, and one internal to the unit. This is a straightforward task and should only take around 30 mins at most to complete.

Electricity consumption

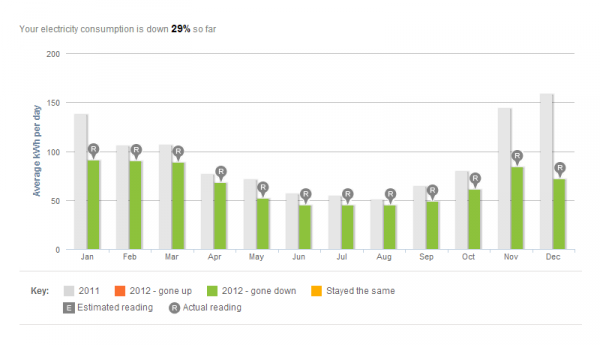
So, we finally get onto our electricity consumption over the last year. Bearing in mind the house is now almost twice as big as it was previously with a larger space to heat and more appliances and lighting, I’m very happy to report that our electricity consumption has actually gone down over the last year by around 30%! I’ve got to say I am very pleasantly surprised by this and I had feared quite a few times that we would be using more electricity.

Our solar PV system will have had some impact on these figures due to the fact we will have used our own generated electricity some of the time rather than having to import it. But this is probably not a significant factor as the times when we were generating the most electricity were a few hours during sunny Spring and Summer days when the heat pump wasn’t on much. Looking at seasonable usage, I suspect the savings are largely down to the efficiency of the GSHP when compared with our previous system. I haven’t had chance to calculate the coefficient of performance (CoP) for our system yet but this is something I would like to do in the future.

Don’t get me wrong – we still use a lot of electricity, much more than a lot of households use I would imagine – but the important and re-assuring thing is that we are now using considerably less than we did before. And given that our only fuel is electricity, this bodes well for the future.
electricity-consumptionSavings and subsidies

Finally, I just wanted to say a little about the financial aspects of this system. In total, it probably cost us around £15K for the installation of the GSHP, which is quite a sizable up front investment, however this was offset slightly by a £1,250 installation grant under the Renewable Heat Premium Payment (RHPP) scheme operated by the UK Government. In addition to this, if all goes to plan, the new Renewable Heat Incentive (RHI) scheme should start in Summer 2013 which will provide an annual payment towards the cost of the installation, similar to the Feed-in-Tariff (FiT) scheme for Solar PV installations, over a proposed 7 year period (compared with the 20+ years for solar). This would more than cover the cost of installation of the GSHP system, and when combined with the solar FiT payments we are already receiving, will cover the cost of all of our energy usage over the next few years.
More solar PV goodness

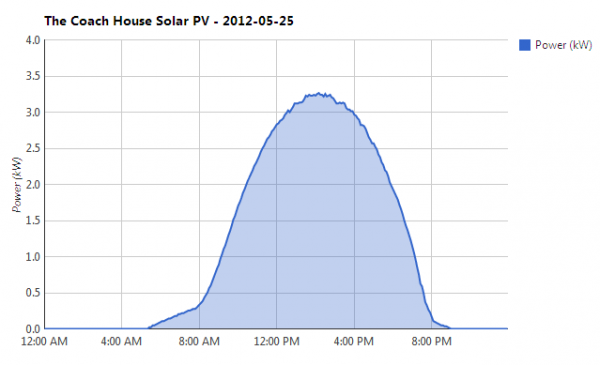
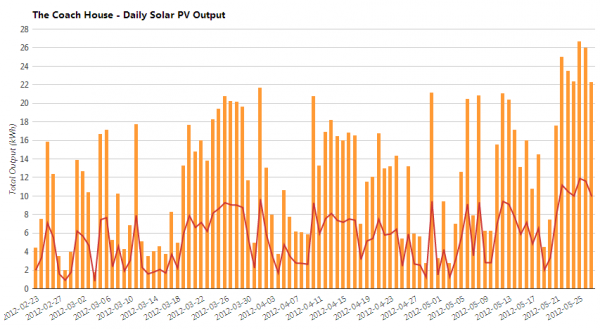
A couple of days after posting about the latest record day from my solar PV installation, the record was broken again! A new record of 26.69 kWh for the day.

In fact, the last 6 days have all produced over 22 kWh for the day.

And finally, another comment on the performance of my ground source heat pump. With the recent hot weather the heat pump has been on an average of only 1 hour a day – in fact yesterday it didn’t come on at all! All helping to save me money 🙂

An amazing online shopping experience

After having more than my fair share of bad luck with online shopping, failed deliveries etc. I think my luck might have just turned…

Bearing in mind it’s a Saturday afternoon, I’ve just ordered a new Neff combination microwave and dishwasher for our new kitchen from Appliances Online , and not only are they the cheapest I could find online, but they also include free next day delivery. Now get this – next day means literally next day so my two appliances are being delivered tomorrow ON A SUNDAY! Amazing! Well done Appliances Online – you are setting the standard for other online retailers to follow.

And to complete a very satisfactory online shopping experience I’ve also just ordered two Original BTC Titan Size 3 aluminium pendant lights for the new kitchen from John Lewis… and they are offering next day click-and-collect from my local Waitrose. Again, next day being SUNDAY!

Excellent service from both companies – well done.

A new solar PV record day

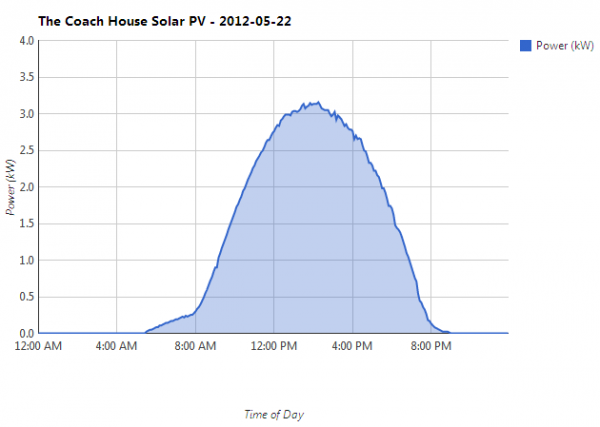
Today our solar PV installation generated 25.07kWh of electricity, a new record beating the previous high of 21.69kWh.

This is what the graph from my automated data logging looks like:

As you can see there was unbroken sunshine all day although it only peaked up to around 3.1kW which reduced the overall output for the day. We’ve seen the system peak at over 4kW so I hope as we get later into the year we will see higher daily totals due to the higher peak output.

[ An interesting side note to this – our ground source heat pump was only on for 4 hours today, whereas during colder weather we can expect it to be on around 10 hours a day. I assume this is because of the high temperatures during the day and the obvious much reduced demand for heat. Let’s hope this this is a good indication of typical behaviour during the Summer months. ]