Operation Nürburgring Nordschleife – Achievement Unlocked!

I’ve just got back from a 3 day trip to the famous Nürburgring Nordschleife motor racing circuit in Germany with my good friend and neighbour Rich Hayden and some new found friends, Rich Bromley, Andy Montgomery, Nathan Bower and Andy McWilliams. And what a trip it was!

I’ve always fancied a trip out there so when Rich H asked me if I wanted to go for a long weekend and a bit of Nordschleife (German for “Northern Loop” apparently) action, notionally to celebrate his birthday, I jumped at the chance. I knew I’d enjoy it but I didn’t expect to enjoy it anywhere near as much as I actually did. I put this down to several things…

Primarily, just the whole atmosphere of the place and the whole experience of staying very close the circuit (in the Hotel an der Nordschleife, very close to the Adenau bridge), and being able to walk part of the circuit. If I’d known how easy it was to get onto the track I’d definitely have packed my can of spray paint so I could add my name next to the thousands of others on the tarmac.

Secondly, the great company I was in had a big influence on the whole atmosphere. The fact that 3 of the other guys had two Ferrari 360 Challenge Stradale’s and a 360 Spider between them helped too! The drive down there through France, Belgium and Germany, and then back through Germany, Holland (via Antwerp airport), Belgium and France was like one long Top Gear road trip. Awesome.

Track time

On the second day there, we hired some race cars from the excellent rental company Rent Race Car. Rich H and I hired a Renault Sport Clio Cup (201 HP) and the other guys hired two Suzuki Sport Swifts (130 HP) between them. Now these sound quite tame but they were perfect for our first few laps of The Ring – I’m glad we didn’t get anything bigger.

We each had 6 laps of the circuit in the race cars spread out over the whole day and were also lucky enough to experience changing weather throughout the day, from dry overcast conditions in the morning, through a damp circuit early afternoon and finally pelting rain late afternoon. We also managed to get in a couple of steady laps in the Ferraris.

We saw a fair few accidents while we were on the circuit, thankfully none involving us – although Nathan managed to spin his 360 Spider at one point and collected some souvenir Ring mud around his wheel arches. Andy McW was the passenger alongside Nathan at the time and I think it’s fair to say he experienced a bit of “soiling” himself too, if you catch my drift 😉

Here are a couple of videos shot by Andy M which are up on YouTube. They were shot from one of the Suzuki Swifts – I’m driving the Clio in front in the first clip 🙂 (apologies for any fruity language – I have no control over that!)

A few words about GT5 on the PS3…

I’ve got to say that having done a lot of laps of the Nordschleife on the PS3 version of Gran Turismo 5 I had a decent recollection of the circuit, although not quite enough confidence on the first few laps for every single corner, particularly the blind ones, to be able to not back off the throttle and carry the speed through the corner.

People had told me not to place too much importance on having done laps on GT5 but I feel I definitely benefited from it. The most notable thing you lack on a virtual version of the Ring is the sheer scale of changes in height around the circuit, steep inclines and cambers and changes in road surface. After experiencing it for real, however, I did have to jump on GT5 as soon as I got home to compare… and at times I was actually back on the real circuit rather than in a console simulation 🙂

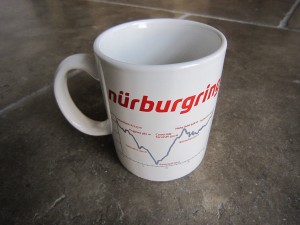
Been there, done that, got the t-shirt, mug and car Ring sticker…

How could I have experienced The Ring without maxing out on merchandise!
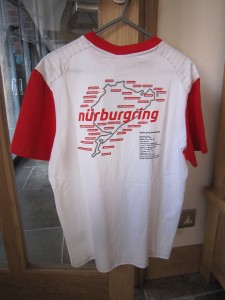
For more photos check out my Flickr photostream:

http://www.flickr.com/photos/darren_scott/sets/72157629272714582/

If only all IT problems were this easy to solve…

I recently installed a couple of new packages on my trusty HP ML115 G5 internet facing Debian server. This server is normally virtually silent, only occasionally getting louder when under increased load (oh, apart from when it is rebooted when it sounds like a Boeing 747 taking off for 20 seconds or so as the fan is run at full speed!) However, after this recent update I noticed that the fan noise was significantly louder than normal even at idle. I couldn’t believe that installing these new packages had any link with the increased noise but I didn’t have time to investigate further until a couple of days later…

After eventually proving that the increased fan noise was not down to increased load on the CPU I decided to pop open the side panel to take a look… and it was then that I noticed a ball of fluff and a fair amount of dust on the CPU heatsink and fan. The fan was running smoothly, but faster and noisier than usual. So I gave it a quick blast of air, the dust and fluff was removed and within a few seconds the fan noise reduced to almost silent again!

After so many years living and working with computers I can’t believe I didn’t check the stupidly obvious. So, from now on, whatever the IT problem, I’m going to check for dust and fluff first!

Automated solar PV stats

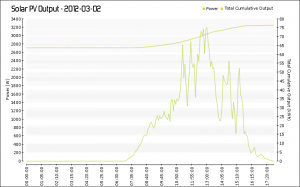
Following on from previous posts about our new solar PV installation, I have now implemented an automated process which pulls stats from the SMA SunnyBoy 4000TL bluetooth-enabled inverter, stores the stats in a MySQL database and then makes a daily chart available showing solar PV generation, looking something like this:

In a little bit more detail…

  • Everything is hosted on my Debian Linux server.
  • I use the excellent open source sma-bluetooth package (http://code.google.com/p/sma-bluetooth/) and the bluez-tools package to connect to my inverter via bluetooth. The smatool program within this package stores the data it downloads in a simple MySQL database.
  • I have a cron job which runs this data extraction every 5 minutes.
  • I then wrote a simple PHP script which uses the excellent pChart 2 library (http://www.pchart.net/) to generate a daily output chart which is hosted on my personal web server.

So, I can now keep track of how much electricity I am generating wherever I happen to be!

Solar PV update

Our solar PV array has been installed for a few days now so I thought I’d post an update with a few more details now that we’ve had some time to get to know it.

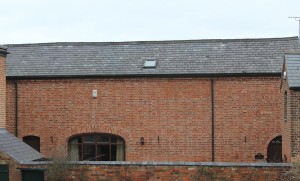
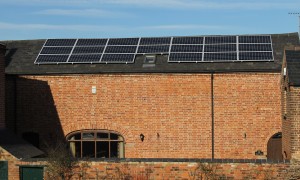
The PV panel array itself isn’t actually as large as I had originally imagined. It consists of 20 x LINUO 195Wp panels mounted onto Schüco Lite rails, but they are slightly smaller than some other panels and so don’t take up as much space. Here are pictures of the roof before…

and after…

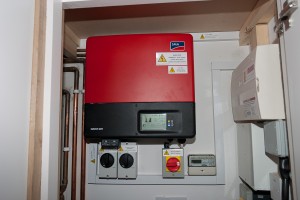
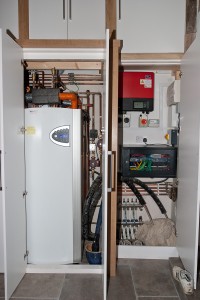
I’m very pleased that we were able to install the internal components – inverter, generation meter and isolator switches – in the service cupboard next to our secondary electrical distribution board and heat pump / cylinder as it makes for a tidy and hidden installation.

In the pictures below you can see the inverter (the big red and black box) with the two DC rotary isolator switches below it to the left, and then the AC rotary isolator and generation meter below it to the right.

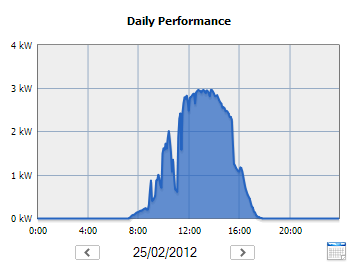
The inverter that we have is an SMA SunnyBoy 4000TL-20 and this features a bluetooth link as standard allowing various performance stats and configuration to be accessed remotely. I’ve downloaded the free Sunny Explorer software from the SMA web site and monitored performance over the last few days. Here’s the generation graph from yesterday so you can see it’s peaking around 3kW output – I don’t think that’s too bad for a late Winter’s day. It’s also quite addictive (I guess until the novelty wears off!) monitoring the performance throughout the day, praying for the sun to come out!

While the Sunny Explorer software is useful and easy to use, I am very keen on writing my own tools to extract this information from the inverter so that I can do more with the data in a more automated way. I’ve already started playing with some open source Java libraries for interfacing with SMA inverters via bluetooth so hopefully I’ll have something up and running soon. At some point I’d also like to look into an interface into our IVT Greenline HT+ heat pump so I can do a similar thing with that.

We now have solar PV

In the space of 6 months we’ve gone from having nothing to do with renewable energy to now having a ground source heat pump providing hot water and heating for our house, and as of today a solar photovoltaic (PV) array generating electricity for our consumption and export of any surplus back to the grid.

Our solar PV installation consists of an array of 20 LINUO 195W (peak) monocrystalline silicon panels arranged in landscape orientation on our 30° pitch South facing roof feeding back into an SMA SunnyBoy 4000TL inverter. It is rated at 3.9kWh peak and has an estimated annual output of 3,560kWh.

The supply and installation was carried out very efficiently and professionally by Greenday Renewables based at Fort Dunlop, Birmingham. Thanks to them for managing to get the installation completed before the 3rd March cut-off for reduced Feed in Tariff rates.

Within a few minutes of the installation being completed and the inverter powered up, it was generating electricity at a peak of 2.5kWh! Almost exactly on cue, after a day and half of dark skies, wind and rain, the sun came out and shone brightly 🙂

Another ground source heat pump update

So… we’ve been living with our IVT Greenline HT+ E11 11kW ground source heat pump for another week or so now and I happy to report that it’s still performing admirably.

The outside temperature is just below 0°C and the house is nice and warm, with the new part of the house with underfloor heating at around 20°C.

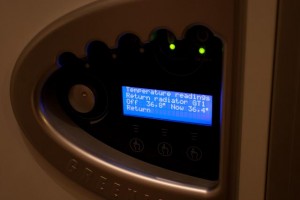
The glycol based heat transfer fluid which collects heat from the ground is currently entering the heat pump at 1.3°C and after heat has been extracted from it, it is being returned to the ground loop at -1.9°C.

We currently have the hot water temperature set to 48°C but I’m going to try lowering that to 47°C in an effort to squeeze a bit more efficiency out of the system for no noticeable impact.

I’m also watching the electricity meter and compressor operating times like a hawk but so far my gut feel is that we’re using less electricity than we were over a similar period of cold weather last year.

The heat pump throws a wobbler!

All has been well with my new ground source heat pump system since it was commissioned at the beginning of January although it has needed a fair bit of tweaking of controls to get everything working as desired. It’s taken me a couple of weeks to really understand how all the different settings work together to produce the end results, but I think I’m almost there with it now…

That was until the underfloor heating simply refused to get warm a couple of days ago!

The target temperature being shown by the heat pump for the underfloor circuit looked perfectly reasonable yet the actual temperature reading from the sensor next to the shunt / mixer valve controlling the underfloor supply was way too low. And it simply refused to get anywhere near the target temperature despite regardless of any settings changes I made. After previously thinking I’d got the heat pump operation and control completely sussed, this was a bit of a let down.

After speaking with the excellent technical support team at ICE Energy they decided it would be best if an engineer came out to check the shunt valve, so an appointment was booked.

Shortly afterwards I just happened to be looking over the heat pump installation and I noticed that the pressure gauge for the unvented system had dropped from the normal of around 2 bar to just over 0.25 bar. This wasn’t right so I corrected it and lo and behold, the temperature of the underfloor circuit started to rise!

I called ICE Energy back and explained what I had found and they told me that an air lock or low pressure would cause the symptoms I’d been experiencing, which was reassuring.

So fingers crossed, that little hiccup is fixed now. And, as equally important I am back to being confident I know how the system works again!

Our ground source heat pump is now alive!

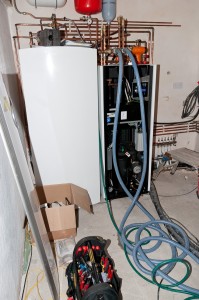
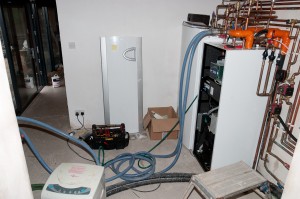
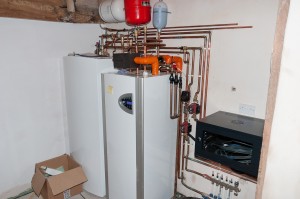
After several months of research, product sourcing, price negotiation, grant and subsidy research, extensive groundworks and final installation, I am very pleased to announce that our ground source heat pump has now been commissioned and is up and running providing heating and domestic hot water for the whole house!

Commissioning


The process of commissioning the heat pump is quite lengthy and involves several steps including:

  • checking the basic installation
  • making final electrical connections to the heat pump
  • filling the ground loop with the water/glycol heat transfer fluid
  • test running the pump components
  • setting initial heat pump controller settings
  • heating the contents of the 300 litre hot water cylinder using the in-built immersion heaters to bring it close to working temperature

All of this was carried out by Ben, a very knowledgeable and competent engineer from ICE Energy and after all the steps were completed the heat pump was powered up and it got up to speed in no time at all.

Initial impressions

The first thing I was relieved to notice was that the heat pump is very quiet. As it is situated in the new enlarged hallway next to the new family room I was praying that it wouldn’t be too loud so as to be noticeable. I had previously been told that it would not sound any louder than a typical fridge but I was still slightly apprehensive given it’s position in the house. However I’m happy to say that it is absolutely fine from a noise perspective. Additionally, it will be enclosed in a purpose built cupboard with the potential for further internal soundproofing so noise will not be an issue.

The second thing I noticed was how quickly it got up to speed heating up both the new underfloor heating and existing radiators in next to no time.

One minor worry we’d had in our minds throughout the installation of this system was whether it would provide sufficient heat for the radiators in the existing part of the house (2/3 of the total house split over 2 floors). As the temperature of the water output from the heat pump is lower than that from other hot water boilers typically used with radiators, we’d been told that the radiators would never get as hot as previously, feeling only lukewarm to the touch. However, since the heat pump was switched on the radiators have felt no cooler than before which was quite a surprise!

The control system for the heat pump is very different to controls found on traditional heating systems, with numerous temperature sensors monitoring the outdoor and indoor temperatures, flow and return temperatures for the ground loop heat transfer fluid, radiators and underfloor heating and using these in combination with various heat curve settings in order to determine how much heat is required from the pump. The wealth of control settings is quite overwhelming but apparently once the system is established we should hardly, if ever, need to adjust these settings.

In conclusion

Overall, I’d say the house has been hotter than we expected since the heat pump took over from the old system, which is reassuring given our initial concerns about how it would cope with so many radiators.

Although the heat pump was configured with an initial range of settings I’m sure there will be lots of tweaking (in consultation with ICE Energy’s excellent technical support line) over the next few weeks until we get to a point where we are comfortable with everything.

What’s wrong with my FreeNAS NAS now!

A near-death experience

My FreeNAS based NAS has had an interesting life so far but I thought it had bitten the bullet today!

After experiencing yet another power outage caused by the main fusebox tripping, my various servers appeared to come back up OK with fans whirring and lights blinking. However, a couple of hours later when I attempted to access some files on my NAS, I was greeted with a “can’t connect” type error. I tried accessing the FreeNAS web GUI – no response. Next I tried pinging the box from the shell – dead. So, as a last resort I connected up the monitor and a keyboard… and found the console full of errors relating to mount failures and unrecoverable errors.

To cut a long story short it looks like the power failure corrupted the FreeNAS OS install on the flash drive (and after a bit of Googling it sounds like this happens more often than you would hope!). Given that my RAIDZ array is separate from the OS install being split across the 4 Samsung 2TB drives, I was hopeful that I would be able to reinstall FreeNAS on the flash drive and restore the previously configured ZFS volume. Unfortunately I’d not got round to creating a backup of the FreeNAS configuration (tut tut) so I would have to configure it all up again by hand.

The phoenix rises from the ashes…

After plugging in a brand new 4GB flash drive and running the CD based installer again, I had a fresh vanilla FreeNAS install configured with the same network settings as previously. I was then able to access the web GUI and start to restore what I could remember of the previous configuration. First I created the users and groups required and then performed an auto-import of the ZFS volume – which worked flawlessly! Very nice.

After reconfiguring the missing CIFS and AFP shares (including the one required for my iMac Time Machine backups), enabling SSH and installing my own SSL and SSH keys I was more or less back to the state I was in before. Woo hoo!

So what I have I learnt from this?

Well, several things really, including:

  • I must get my NAS box connected to my APC UPS (the reason I haven’t so far is just laziness)
  • I must make a backup of my FreeNAS configuration in case I need to do this again
  • I have an even greater respect for the resilience of ZFS volumes
  • I must get my house electrics sorted once and for all!

How fast should my FreeNAS based HP Microserver NAS be?…

It’s been a couple of weeks since I built a home NAS using a HP Microserver N36L with 8GB RAM, FreeNAS 8.0.2-RELEASE and 4 x 2TB Samsung F4 hard drives configured as a RAIDZ2. Apart from a scary incident which resulted in an unexpected real world test of RAIDZ2 resilience, the NAS has been pretty stable although I’ve not been blown away by read/write performance over the network. I didn’t really want to get into fine tuning ZFS this early as I was hoping the out-of-the-box performance would be good enough, but it looks like I’m going to have to do a bit of investigation to understand why performance is not as good as I had hoped.

Network dropouts

It’s worth mentioning that I was also experiencing regular incidents of the NAS dropping off the network and reappearing several seconds later. This was particularly noticeable when SSHing onto the box using Putty, only to have the shell stop responding and the connection terminated a few seconds later. At the same time the web GUI would also stop responding and any remote file shares would also disappear.

Checking the FreeNAS logs didn’t show anything scary such as disk problems, so I Googled a bit and found many reports of problems with the on-board Broadcom based NC107i embedded network controller on the HP Microserver N36L. Users report regular network disconnection and reconnection problems and many have resorted to installing a separate quality NIC (such as an Intel PRO/1000 server or desktop card) in one of the PCIe slots. This sounded promising and I was all set to order a NIC when it dawned on me that I had been playing about with configuring my various network devices for jumbo frames support and when I couldn’t get it to work reliably had forgotten to revert my Win XP PCs NIC settings back to a default MTU of 1500! As soon as I did this the NAS network connection was steady again so I’ve delayed the purchase of a separate NIC… for now at least!

Testing network speed with iperf / jperf

Given the numerous reports of problems with the on-board NIC in the N36L, the first test I wanted to perform was a low level network test using iperf and its GUI front-end jperf. Luckily iperf is bundled with FreeNAS so it was simply a case of starting it in server mode using the command:

iperf -s

Then I fired up jperf on my iMac and ran a few basic tests…

The results were very positive! After several runs the average TCP transfer rate was around 910 Mb/s (or around 113 MB/s) which must be near the theoretical maximum throughput for a Gigabit network. Now these were not exhaustive tests for any long period or under sustained load, but the on-board network controller appears to be doing its job at least some of the time so I don’t think that’s the main cause of poor performance.

So next I think I need to start drilling down into testing the raw hard drive IO performance and then maybe onto a bit of ZFS tuning. But that will have to wait until another post 🙂