What’s wrong with my FreeNAS NAS now!

A near-death experience

My FreeNAS based NAS has had an interesting life so far but I thought it had bitten the bullet today!

After experiencing yet another power outage caused by the main fusebox tripping, my various servers appeared to come back up OK with fans whirring and lights blinking. However, a couple of hours later when I attempted to access some files on my NAS, I was greeted with a “can’t connect” type error. I tried accessing the FreeNAS web GUI – no response. Next I tried pinging the box from the shell – dead. So, as a last resort I connected up the monitor and a keyboard… and found the console full of errors relating to mount failures and unrecoverable errors.

To cut a long story short it looks like the power failure corrupted the FreeNAS OS install on the flash drive (and after a bit of Googling it sounds like this happens more often than you would hope!). Given that my RAIDZ array is separate from the OS install being split across the 4 Samsung 2TB drives, I was hopeful that I would be able to reinstall FreeNAS on the flash drive and restore the previously configured ZFS volume. Unfortunately I’d not got round to creating a backup of the FreeNAS configuration (tut tut) so I would have to configure it all up again by hand.

The phoenix rises from the ashes…

After plugging in a brand new 4GB flash drive and running the CD based installer again, I had a fresh vanilla FreeNAS install configured with the same network settings as previously. I was then able to access the web GUI and start to restore what I could remember of the previous configuration. First I created the users and groups required and then performed an auto-import of the ZFS volume – which worked flawlessly! Very nice.

After reconfiguring the missing CIFS and AFP shares (including the one required for my iMac Time Machine backups), enabling SSH and installing my own SSL and SSH keys I was more or less back to the state I was in before. Woo hoo!

So what I have I learnt from this?

Well, several things really, including:

  • I must get my NAS box connected to my APC UPS (the reason I haven’t so far is just laziness)
  • I must make a backup of my FreeNAS configuration in case I need to do this again
  • I have an even greater respect for the resilience of ZFS volumes
  • I must get my house electrics sorted once and for all!

How fast should my FreeNAS based HP Microserver NAS be?…

It’s been a couple of weeks since I built a home NAS using a HP Microserver N36L with 8GB RAM, FreeNAS 8.0.2-RELEASE and 4 x 2TB Samsung F4 hard drives configured as a RAIDZ2. Apart from a scary incident which resulted in an unexpected real world test of RAIDZ2 resilience, the NAS has been pretty stable although I’ve not been blown away by read/write performance over the network. I didn’t really want to get into fine tuning ZFS this early as I was hoping the out-of-the-box performance would be good enough, but it looks like I’m going to have to do a bit of investigation to understand why performance is not as good as I had hoped.

Network dropouts

It’s worth mentioning that I was also experiencing regular incidents of the NAS dropping off the network and reappearing several seconds later. This was particularly noticeable when SSHing onto the box using Putty, only to have the shell stop responding and the connection terminated a few seconds later. At the same time the web GUI would also stop responding and any remote file shares would also disappear.

Checking the FreeNAS logs didn’t show anything scary such as disk problems, so I Googled a bit and found many reports of problems with the on-board Broadcom based NC107i embedded network controller on the HP Microserver N36L. Users report regular network disconnection and reconnection problems and many have resorted to installing a separate quality NIC (such as an Intel PRO/1000 server or desktop card) in one of the PCIe slots. This sounded promising and I was all set to order a NIC when it dawned on me that I had been playing about with configuring my various network devices for jumbo frames support and when I couldn’t get it to work reliably had forgotten to revert my Win XP PCs NIC settings back to a default MTU of 1500! As soon as I did this the NAS network connection was steady again so I’ve delayed the purchase of a separate NIC… for now at least!

Testing network speed with iperf / jperf

Given the numerous reports of problems with the on-board NIC in the N36L, the first test I wanted to perform was a low level network test using iperf and its GUI front-end jperf. Luckily iperf is bundled with FreeNAS so it was simply a case of starting it in server mode using the command:

iperf -s

Then I fired up jperf on my iMac and ran a few basic tests…

The results were very positive! After several runs the average TCP transfer rate was around 910 Mb/s (or around 113 MB/s) which must be near the theoretical maximum throughput for a Gigabit network. Now these were not exhaustive tests for any long period or under sustained load, but the on-board network controller appears to be doing its job at least some of the time so I don’t think that’s the main cause of poor performance.

So next I think I need to start drilling down into testing the raw hard drive IO performance and then maybe onto a bit of ZFS tuning. But that will have to wait until another post 🙂

RAIDZ resilience put to the test on my new NAS!

In a previous post, I discussed building a NAS device for my home network using an HP Microserver kitted out with 4 x Samsung F4 2TB drives and 8GB of RAM, and running the FreeBSD-based FreeNAS OS. One key objective was to build in a high degree of resilience and so I chose a ZFS RAIDZ2 disk configuration which would tolerate up to 2 concurrent drive failures while still maintaining integrity of the data. At the time, I didn’t fully understand what a real life drive failure would look and feel like… but that was soon to change!

Houston, we have a problem

The NAS had been up and running for a couple of days with no problems at all. I hadn’t started copying real data across to the device but had played with using the web GUI, setting up some ZFS datasets and associated CIFS and AFP shares, some test transfers from different computers and accessing the device using SSH. All seemed very well.

It was while logged onto the box with SSH that I first noticed strange problems. For some reason, the connection would be terminated and at the same time the web GUI would stop responding. Then, a few seconds later I would be able to connect again and the whole cycle would repeat. I also noticed that if I put my ear to the box (it is pretty quiet under normal operation) I could hear what sounded like a drive repeatedly spinning up and down. That noise fills me with dread when it’s not something you specifically want to happen.

I then decided to restart the box and watch the boot sequence from the console. On reboot the first thing that was apparent was that it was taking a long time, and the cause seemed to be detecting the drives. Although the first 3 of the 4 drives were detected OK, albeit slowly, it refused to recognise the 4th drive. This seemed consistent with the unexpected drive noise and suggested the 4th drive was having problems.

RAIDZ to the rescue

At this point I decided to shut the box down again, pop out the 4th drive and reboot to see what happened. On restart the box booted quickly without any problems and seemed stable once up. The web GUI alert indicator stated that the volume was in a degraded state and viewing the disks making up the RAIDZ2 volume confirmed that the 4th drive was missing. However, throughout this all the data was accessible even though the volume was in a degraded state. So, RAIDZ was doing its job!

Testing the suspected failed drive

I didn’t want to believe that a brand new drive could be suffering a failure so I decided to shut the box down again, put the 4th drive back in and then reboot to see the result. At the same time I removed and replaced each drive in its caddy making sure that the connection was solid, and also double checked the connections of all cables onto the motherboard, particularly the single heavy braided cable cluster for the hard drives. On restart, it booted up just fine – and this was with the suspected failed drive back in!

Once the box was back up and stable I decided to run a sequence of S.M.A.R.T. self-tests on the 4th drive. The first short test only took a couple of minutes and came back all OK. The second test was a long one and took several hours to complete. When I checked the results the following morning, everything was reporting OK!

Panic over?

So, could it be that the drive is actually perfectly OK and the problems were down to a different cause? Possibly a dodgy drive caddy connection, or a loose cable connection?

I will definitely keep a very close watch on the system over the next few days.

But one thing positive has come out of this – RAIDZ is doing its job and gives me a fair bit of confidence that my data is safe in the event of a drive failure 🙂

Building a NAS using a HP Microserver, FreeNAS and ZFS

I’ve been wanting to setup a home NAS (Network Attached Storage) solution for a while on which to store the masses of media files, documents, backups etc. we have accumulated as a family rather than having it all spread across numerous computers, mobile devices and external hard drives. I’ve toyed with the idea of getting one of the higher spec off-the-shelf BYOD (Bring Your Own Disk) boxes such as a Synology DiskStation, Drobo FS, QNAP or Netgear ReadyNAS and also as an alternative I’ve considered expanding my existing HP ProLiant ML115 G5 server with some more disks and using that for NAS.

After problems in the past with a very near miss of losing gigabytes of irreplaceable data (thank you very much ABC Data Recovery!) I was very keen on a fault tolerant system which could keep my data safe in the event of losing one or maybe two drives out of a multi-drive array. (Of course, this wouldn’t be a replacement for true external backups but it would give me some peace of mind that my data has a relatively high degree of resilience.) This requirement suggests some sort of mirrored RAID setup, and the Drobo implementation of this sounded particularly tempting especially as you can mix and match drives of different sizes, expand the array up to the maximum number of drive bays available and also swap out and add drives on the fly while the NAS is still functioning. But nice as they are, Drobos are still pretty expensive. As a slightly cheaper option I was looking at the Synology DiskStation devices and I liked what I saw (after having first hand experience of setting up a DS211 for a friend). But, I was still leaning towards a more homegrown and probably cheaper solution…

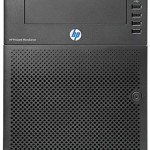
…and along came the HP Microserver!

I’ve been impressed with HP kit for a long time, particularly the business oriented stuff. My trusty ProLiant ML115 server has been running faultlessly under my desk at home for the last few years hosting various mail accounts, low-traffic web sites, development source control repositories and other stuff. So, I happened to be browsing the Ebuyer online shop and saw that HP were doing a £100 cashback offer on the HP ProLiant Athlon II Neo N36L Microserver with 1GB RAM (expandable to 8GB), 250GB hard drive (with a further 3 drive bays unpopulated), on-board NC107i gigabit ethernet and 7 x USB sockets in a well engineered micro tower case. This meant it would cost a mere £124 after cashback – an absolute steal!

After reading lots of happy customer comments on the Ebuyer site saying how well it made a NAS box when running something like FreeNAS, and with the cashback offer deadline fast approaching, I decided it was too good an opportunity to miss and I ordered one along with 8GB (2 x 4GB) of Kingston RAM, 4 x Samsung SpinPoint F4 2TB 5400rpm 32MB cache hard drives and a Sony Optiarc 24x DVD re-writer optical drive.

One other feature worth mentioning is that the motherboard has an easily accessible internal USB socket which is ideal for plugging in a USB flash drive from which the base OS can be run.

FreeNAS & ZFS: The last word in filesystems

FreeNAS is a FreeBSD based platform which is a very popular choice for home built NAS systems. It is built on a solid FreeBSD OS with a handful of services such as CIFS, NFS and AFP sharing, FTP, SSH and features a nice browser based administration GUI. It’s also small enough to be installed on a small USB flash drive which would allow my NAS to boot from the internally installed flash drive leaving the hard drives free for storage only.

One major selling point for FreeNAS / FreeBSD is its support for the ZFS filesystem developed by a very talented team of engineers at Sun Microsystems (now Oracle). If you’ve not heard of ZFS before I recommend you take a look at this presentation by the team who developed it to learn about some of the cool and innovative technology it includes. For me, some of the most compelling features are those related to data integrity, resilience and self-healing in a degraded volume, and by using one of the ZFS custom RAID implementations – RAIDZ1, RAIDZ2 or RAIDZ3 – I would get Drobo-like multi-drive resilience in the event of the loss of 1, 2 or 3 drives respectively.

For my system with 4 x 2TB drives installed, I decided to go with a RAIDZ2 layout which would give me 3.6TB of usable storage with a fault tolerance of 2 drive failures at once. I feel that this gives me a good balance of storage vs fault tolerance given the number and size of drives used.

Installation & setup

After unboxing the HP Microserver I was immediately impressed with its build quality and attention to detail. The server itself is about 210mm (W) x 270mm (H) x 250mm (D) and is of a sturdy construction. The lockable metal front door is perforated to aid airflow and opens to reveal the 4 hard drive bays with removable caddies (the first of which is populated with the 250GB drive included). The spec for the server states that these drives are not hot-swappable but I’ve read that with the correct drivers they can be hot-swapped.

Above the front door is the optical drive bay together with the on/off switch, 4 x USB sockets and LEDs for network and drive activity. There’s also a large HP logo between the front door and optical drive which lights up blue when the server is on, which looks quite cool! The top cover of the server which wraps over and down the top front section of the case slides off to reveal the optical drive bay and is secured with a thumbscrew on the back.

Another small indication of the attention to detail is the inclusion of a set of screws for mounting hard drives in the drive caddies and also for mounting the optical drive which are fixed to the inside of the front door together with a tool for fitting them. A nice touch which means that the server is completely tool-less during set up.

In order to replace the single factory installed 1GB DIMM with the 2 x 4GB DIMMs I had to slide the motherboard out from the base of the server. This was a little tricky involving disconnecting a handful of connectors, some of which are quite stiff, and easing the motherboard out enough to expose the DIMM slots, but it was no more difficult than working on other small form factor PCs.

The final step was to plug in the 4GB USB flash drive onto which I installed FreeNAS 8.0.2-RELEASE (the latest release version available at the time).

After configuring the RAIDZ2 storage (3.6TB usable storage and 2 drive failure resilience) and setting up some CIFS shares and permissions, the NAS was ready for use.

In summary – a poor man’s Drobo FS!

Now that it’s complete, I have a NAS with 3.6TB storage and Drobo-like resilience features for a fraction of the cost. Time will tell how happy I am with this but if the numerous online testimonials are anything to go by, I’m quite optimistic that this will be a good NAS solution.